Running the ARTIC amplicon-nf analysis pipeline using EPI2ME
ARTIC pipelines | bioinformatics
| Document: | ARTIC-MEV-EPI2ME-Setup-v1.0 |
| Creation Date: | {} |
| Author: | Elli Mylona |
| Licence: | Creative Commons Attribution 4.0 International License |
Overview: This guide provides step-by-step instructions on how to install and set up EPI2ME, Oxford Nanopore Technologies’ data analysis platform. It can then be used to run ARTIC bioinformatics pipelines on a Desktop or Laptop computer without having to use a command-line interface.
Requirements:
- The ability to install software on your desktop or laptop. This includes some extra packages like Java and Docker that may require administrator level privileges.
- Internet access to download EPI2ME and the pipeline, and for the first time running it. After that, you should be able to run it offline.
- A sample_config.csv file that can be generated using the ARTIC prepare-nf pipeline.
Installing the EPI2ME software
EPI2ME is a standard desktop software package available for Windows, Macintosh and Linux operating systems and is used to run ‘NextFlow’ pipelines in a simple easy-to-use environment without interacting with a command-line. It can be obtained from the EPI2ME website with downloads for each operating system available from the download page: https://labs.epi2me.io/downloads/
Once you have downloaded the appropriate installer for your operating system, install it in the usual way.
Initial setup of EPI2ME
The first time you run EPI2ME it may need to install some additional software. It will guide you through this process.
Using the ARTIC amplicon-nf analysis pipeline in EPI2ME
Import the amplicon-nf workflow
Open EPI2ME. From the left-hand side panel, select “Launch”.

Then select “Import workflow” and “Import from Github”.

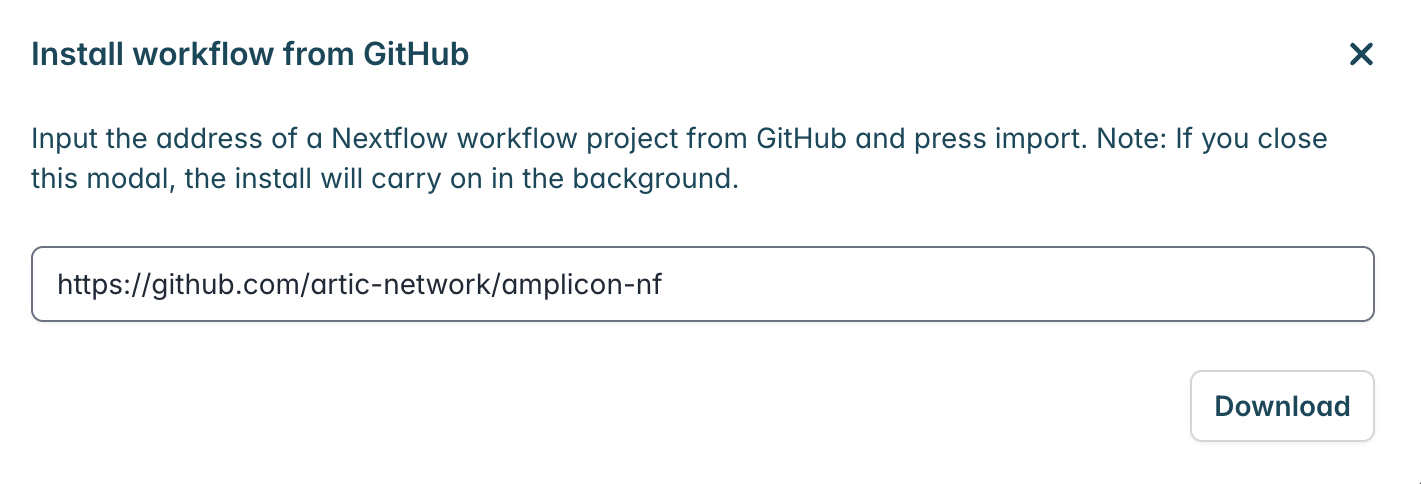
A pop-up window will appear where you can enter the GitHub URL. Enter the URL and click “Download” https://github.com/artic-network/amplicon-nf:
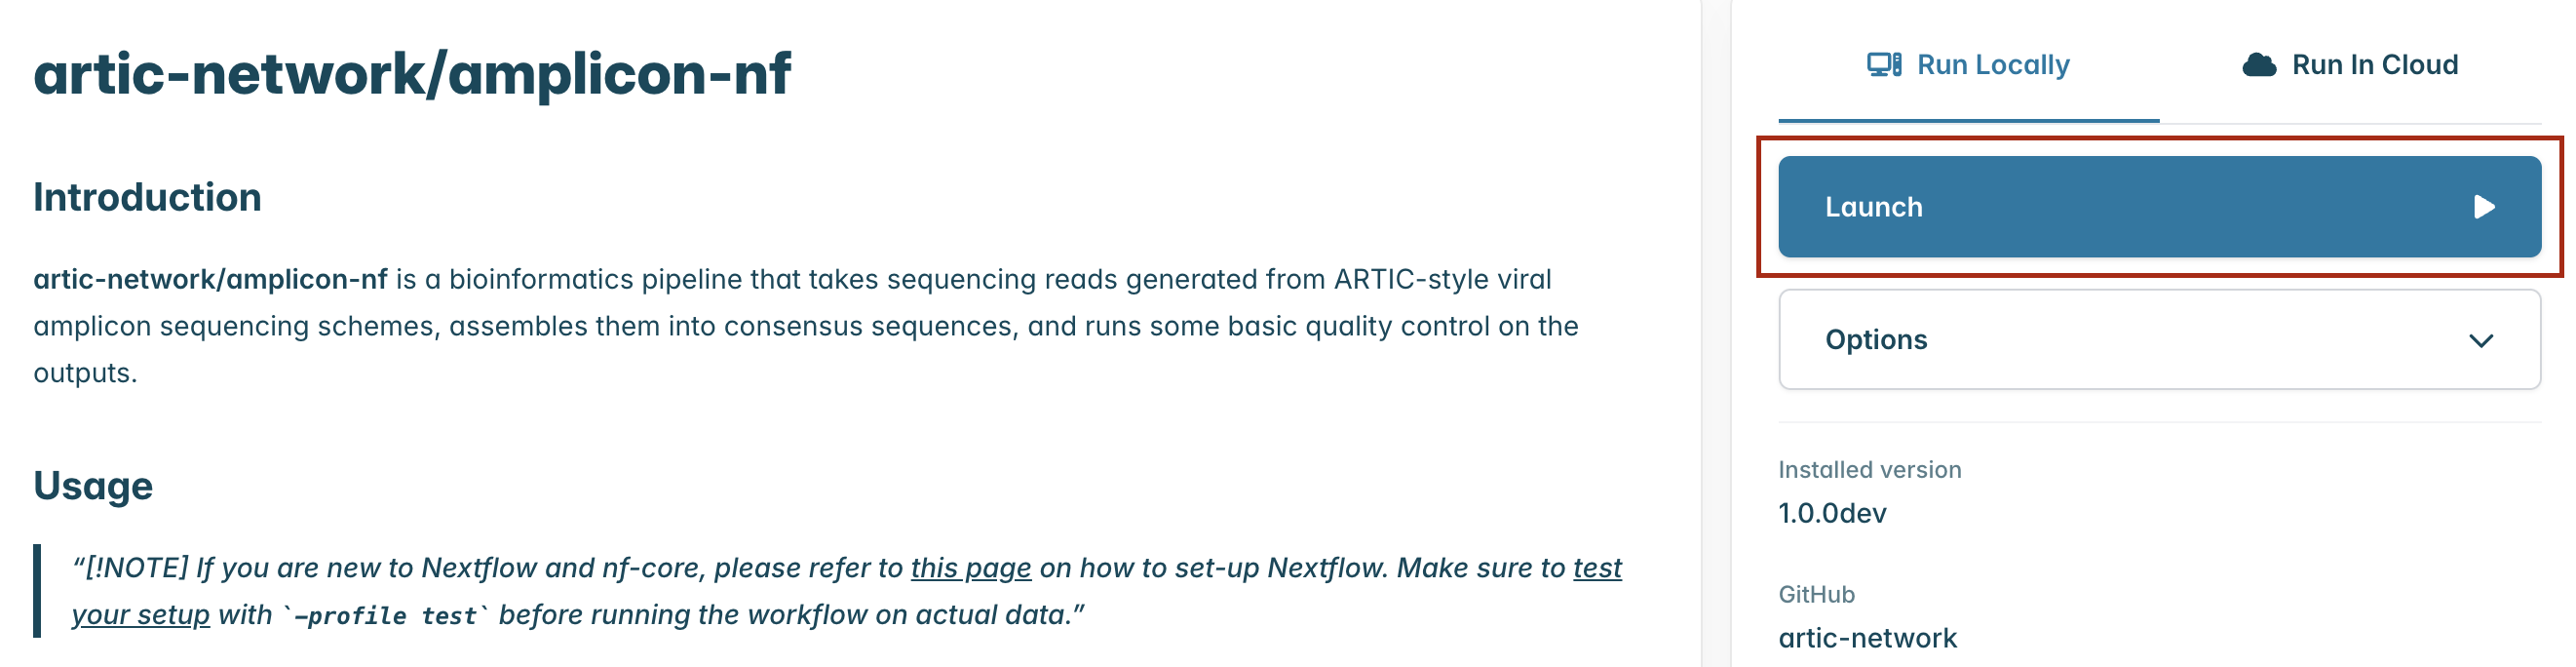
Once it has downloaded, it will be ready in the Launch > Workflows tab. Select the prepare-nf workflow and you will be taken to a landing page for this workflow.
Running the workflow
From the workflow landing page, click “Launch”.
In the ‘Input’ section, select the path to sample_config.csv file that has been generated using prepare-nf.
You can optionally select an output directory where the results will be saved. If you do not select this, results will be saved in a default directory that can be easily found once the run is complete in the ‘Files’ tab.
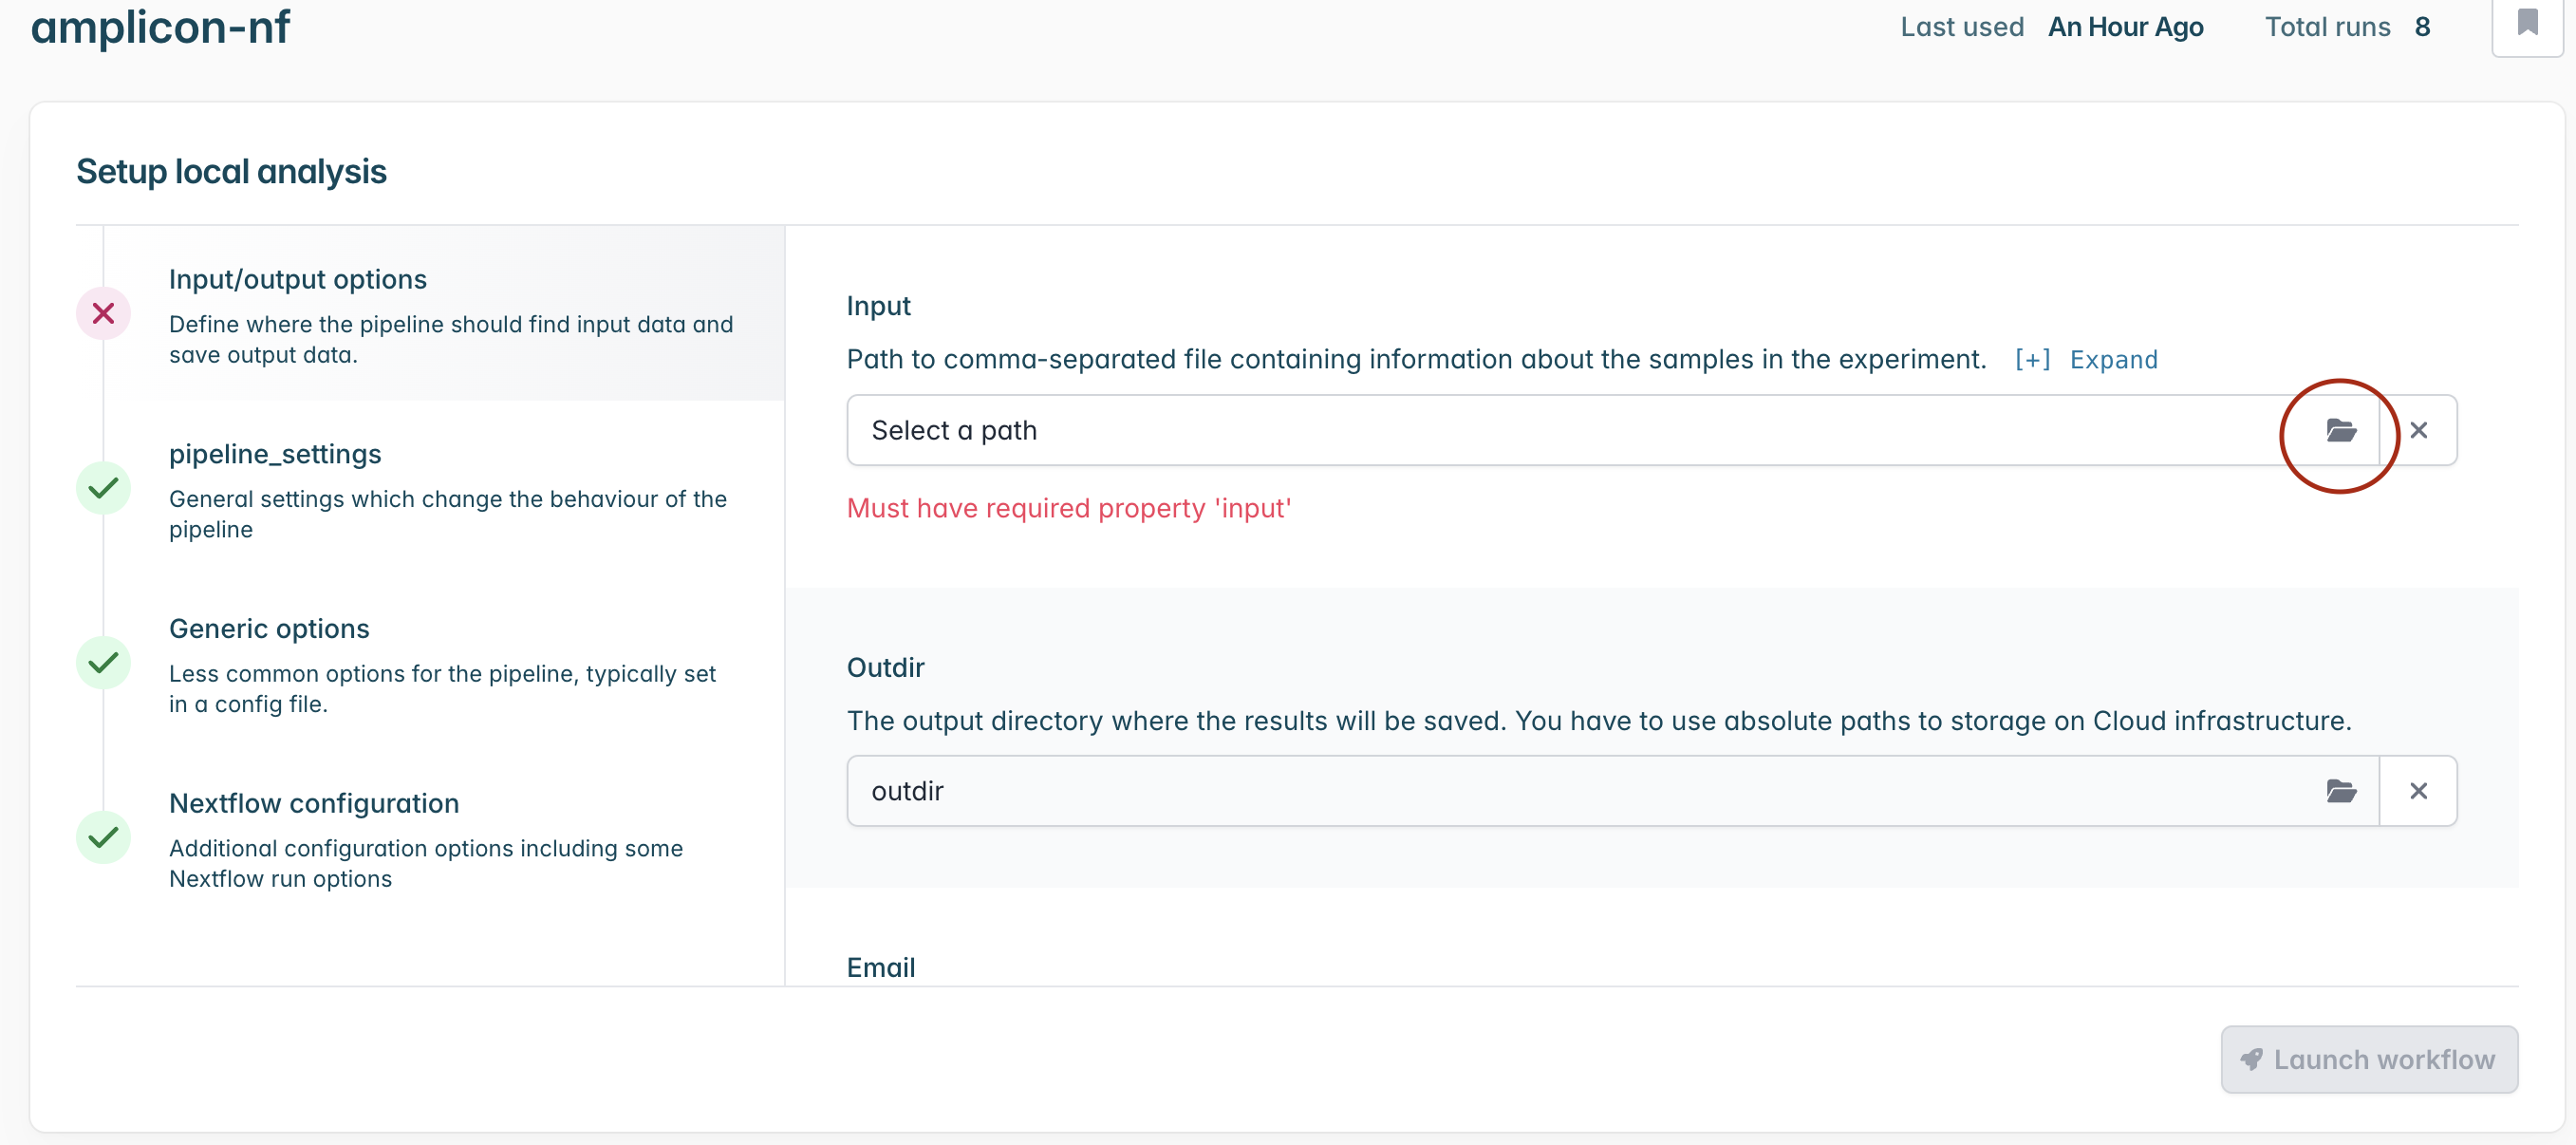
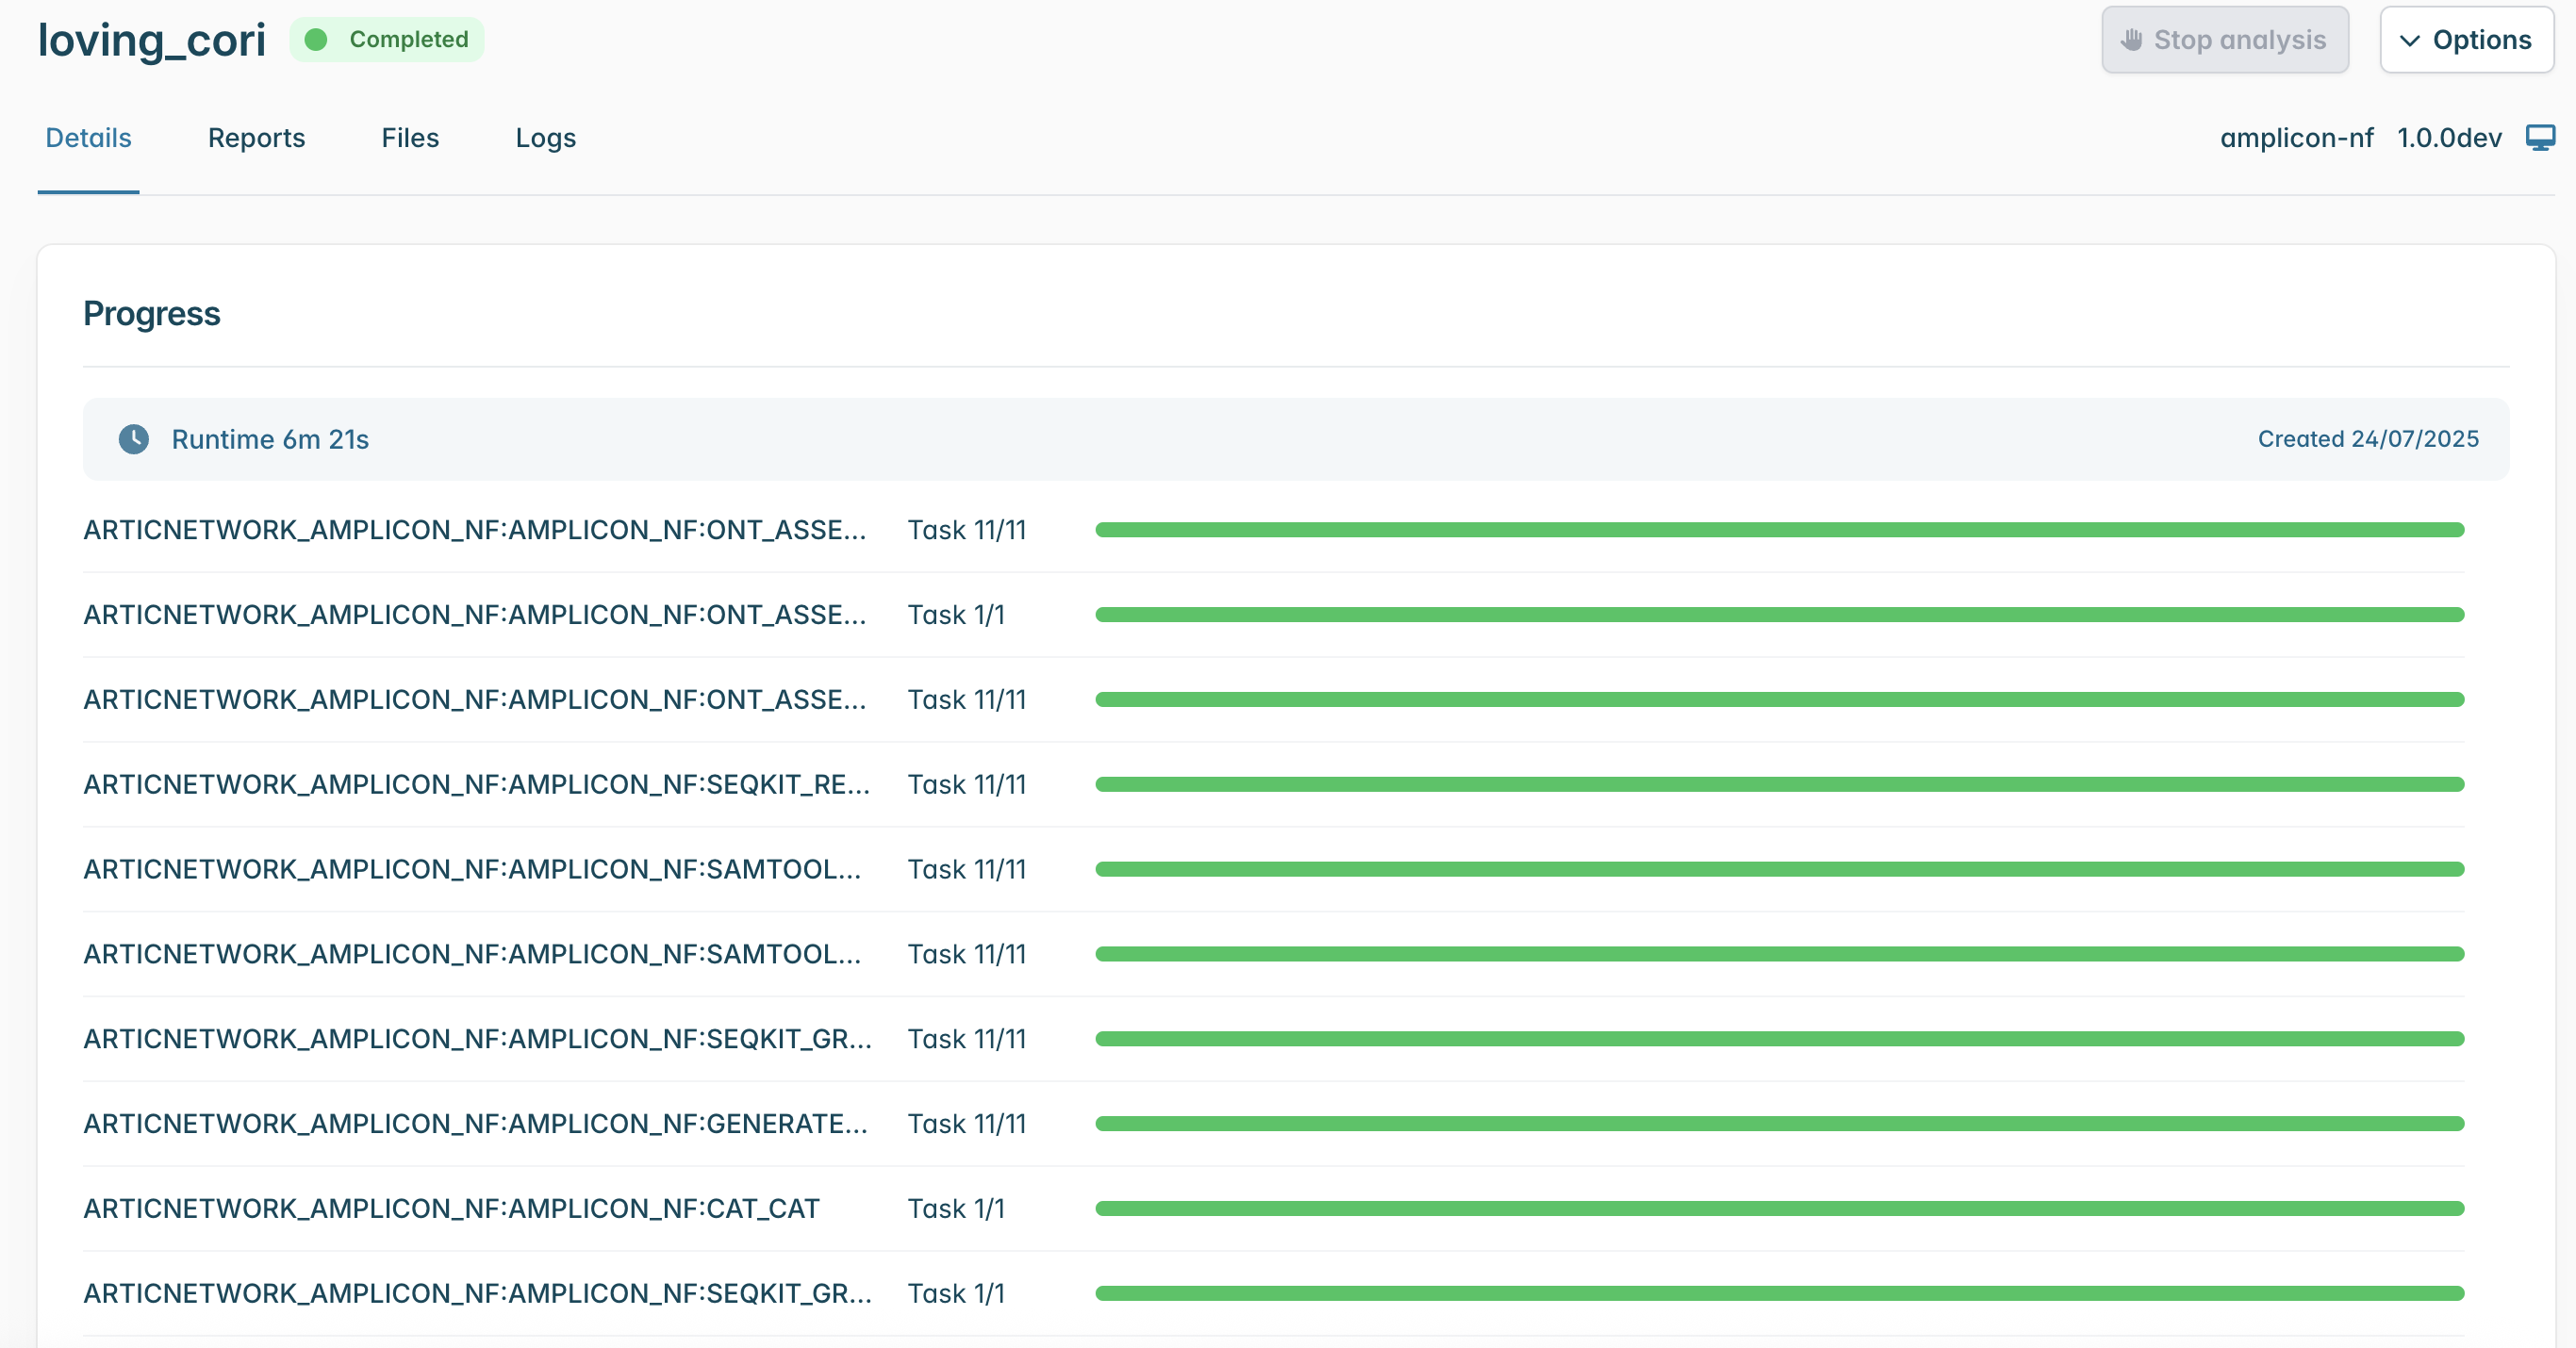
Finally click “Launch workflow”. It will then start running. The runtime will depend on the size of your files and the speed of your computer, but 10-30 minutes is common. While it is running you will see a series of progress bars, and at the top a blue ‘Running’ icon. This will change to green and ‘Complete’ when it has finished.
The output directory will contain a directory for each of your samples, along with two report files.