Running the ARTIC MEV analysis pipelines using EPI2ME
ARTIC pipelines | bioinformatics
| Document: | ARTIC-MEV-EPI2ME-Setup-v1.0 |
| Creation Date: | {} |
| Author: | Elli Mylona |
| Licence: | Creative Commons Attribution 4.0 International License |
Overview: This guide provides step-by-step instructions on how to use prepare-nf in EPI2ME, Oxford Nanopore Technologies’ data analysis platform. It can be used to create a sample sheet to be used as input file in the ARTIC bioinformatics amplicon-nf pipeline on a Desktop or Laptop computer without having to use a command-line interface.
Requirements:
- EPI2ME installed (see also the EPI2ME set-up guide for further information).
- Internet access to download the pipeline, and for the first time running it. After that, you should be able to run it offline.
- Details about sample names, barcode assignment, and any other metadata required for analysis. These should be collated in a CSV or XLS file, and containing the following required columns:
- Sample (e.g., sample1)
- Barcode (e.g. barcode01)
- Any other columns with additional information
Using the ARTIC prepare-nf analysis pipeline in EPI2ME
Import the workflow
Open EPI2ME. From the left-hand side panel, select “Launch”.

Then select “Import workflow” and “Import from Github”.

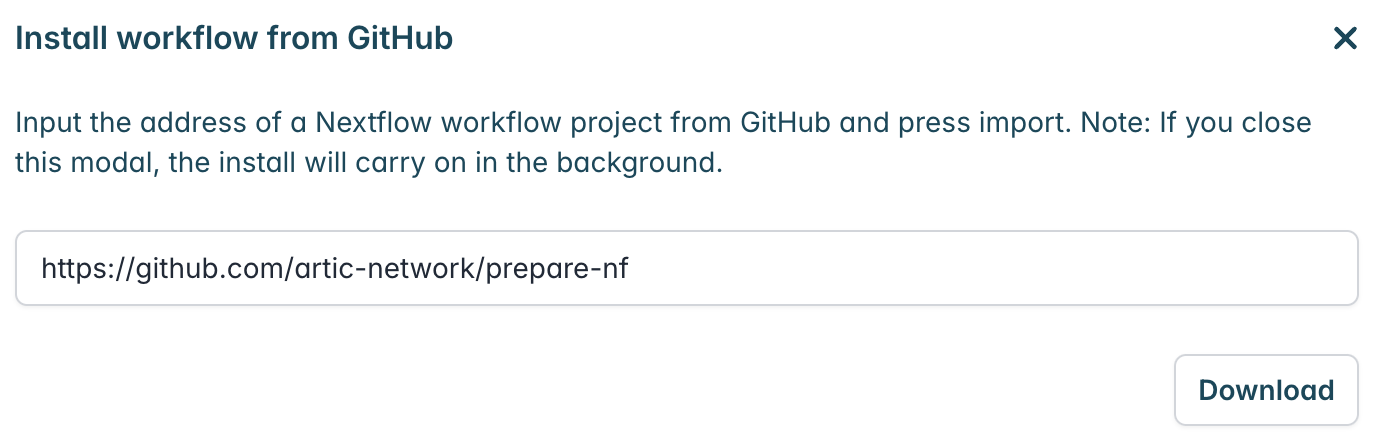
A pop-up window will appear where you can enter the GitHub URL. Enter the URL and click “Download” (https://github.com/artic-network/prepare-nf):
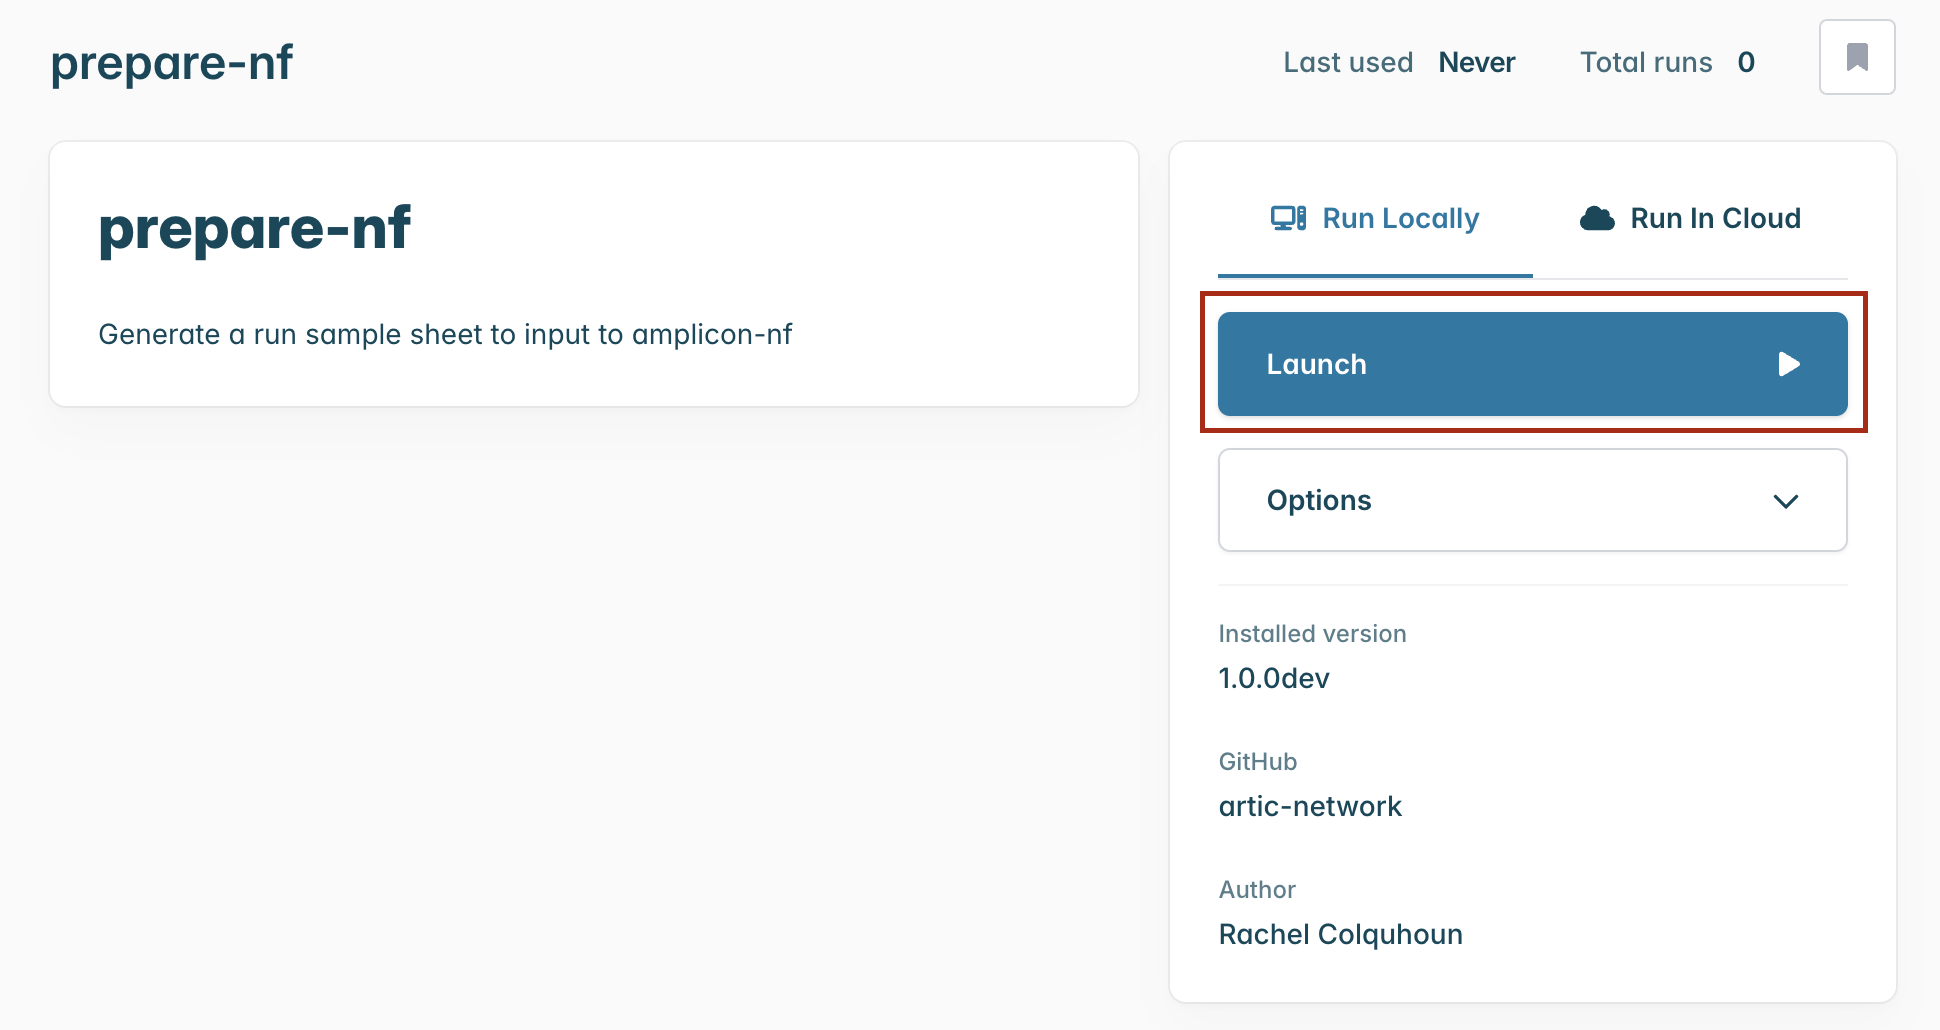
Once it has downloaded, it will be ready in the Launch > Workflows tab. Select the prepare-nf workflow and you will be taken to a landing page for this workflow.
Running the workflow
From the workflow landing page, click “Launch”.
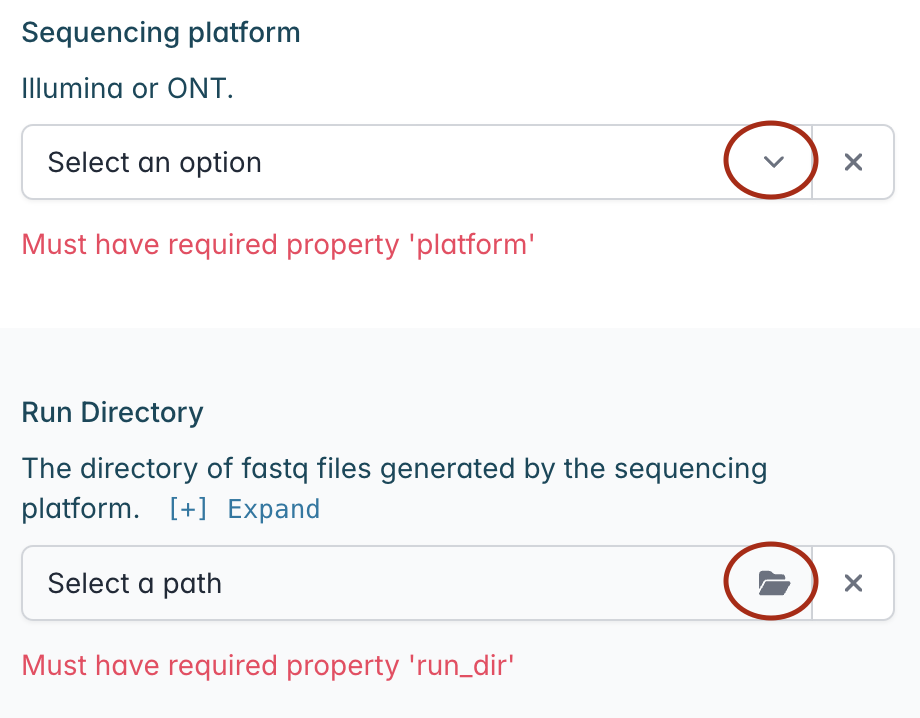
Select the appropriate technology form the “Sequencing platform” drop down menu, along with the path to the fastq files directory in “Run Directory”.
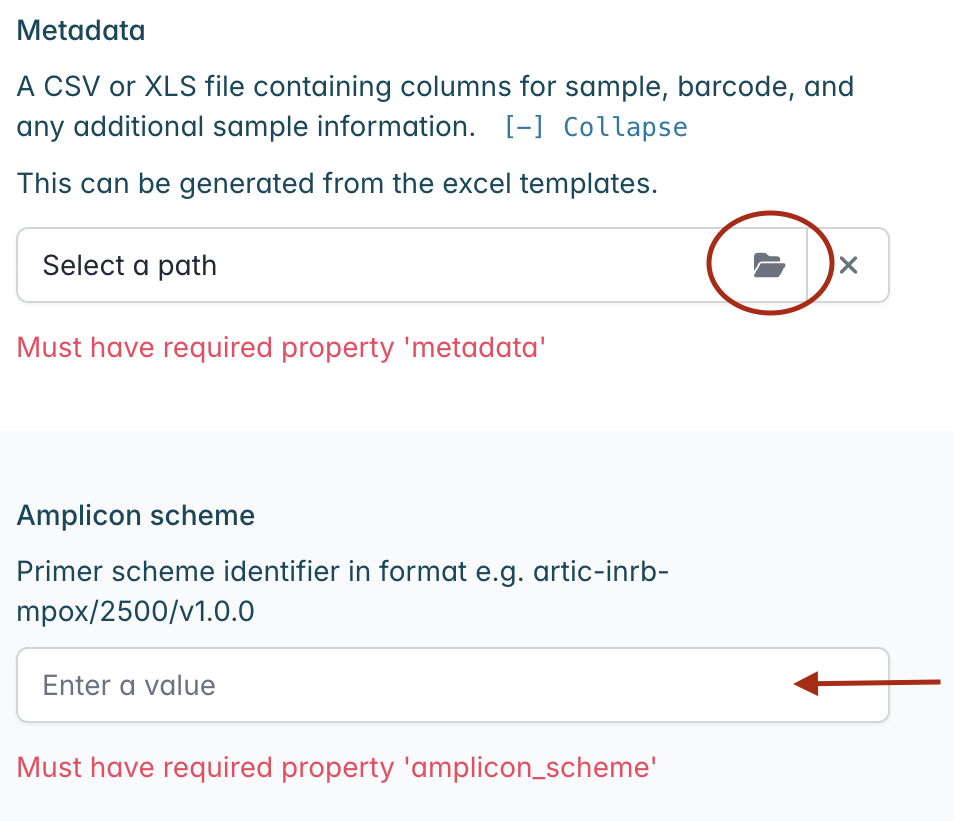
Next, browse for and select the CSV or XLS file containing your metadata in the “Metadata” section.
Enter the name of the amplicon scheme using the nomenclature in Primalscheme labs, e.g., artic-inrb-mpox/2500/v1.0.0. Make sure that the primer scheme matches the one you used for your sequencing.
If your scheme is not listed, you can use the “Path to custom amplicon scheme” section to provide the path to the directory containing your appropriately named scheme bed and fasta files (ensure the directory contains a primer.bed and a reference.fasta file – both are included in the output of PrimalScheme).
Finally click “Launch workflow” and “Launch” in the pop-up window to initiate the workflow. You will be redirected to the “Progress” panel with bars indicating the run progress. The runtime will depend on the size of your files and the speed of your computer, but it usually takes a few seconds. The bar will change to green and ‘Complete’ when it has finished.

When it has finished, navigate to the ‘Files’ tab and double click on the sample_config.csv file. Save this file to your desired location on your computer. You can use this as input for amplicon-nf to proceed with your analysis.