Running the ARTIC MPXV analysis pipelines using EPI2ME
ARTIC pipelines | bioinformatics
| Document: | ARTIC-MPXV-EPI2ME-Setup-v1.0 |
| Creation Date: | 2024-08-22 |
| Last Updated: | 2024-08-22 |
| Author: | Lauren Lansdowne |
| Licence: | Creative Commons Attribution 4.0 International License |
Requirements:
- The ability to install software on your desktop or laptop. This includes some extra packages like Java and Docker that may require administrator level privileges.
- Internet access to download the pipeline, and for the first time running it. After that, you should be able to run it offline.
- Details about how the data was generated including the primer scheme used and the base-caller specified within the MinKNOW software.
Using an ARTIC MPXV analysis pipeline in EPI2ME
—
Import the workflow
Open EPI2ME. On the main dashboard select “View workflows”.

Then select “Import workflow”.

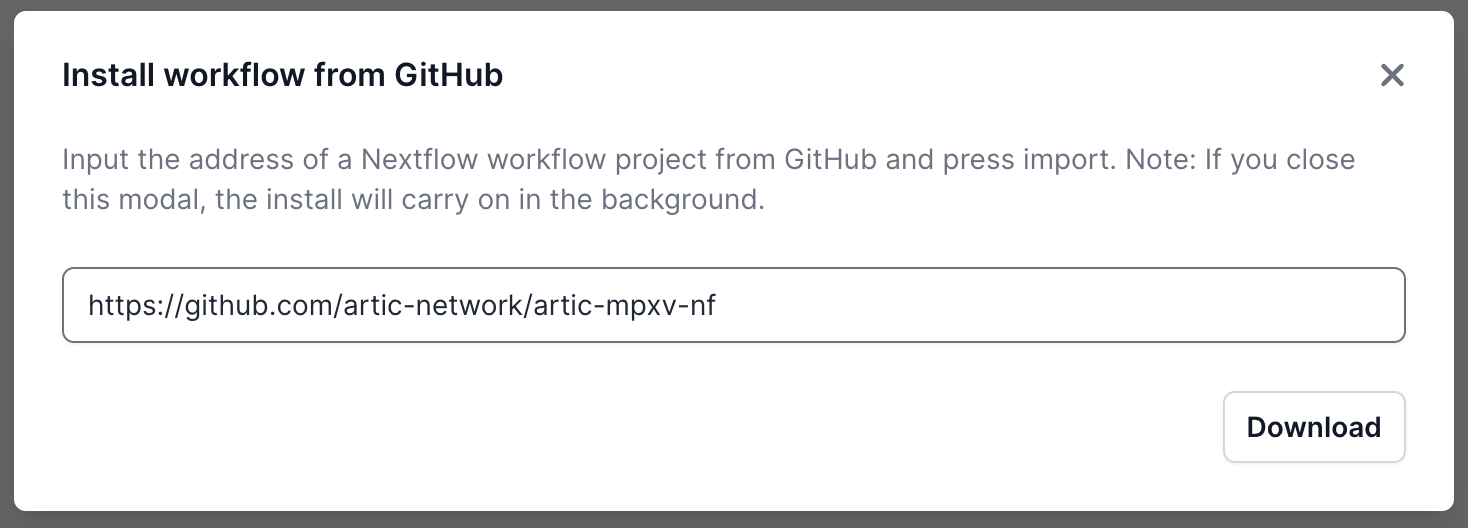
A pop-up window will appear where you can enter the GitHub URL. Enter the URL and click “Download” (https://github.com/artic-network/artic-mpxv-nf):
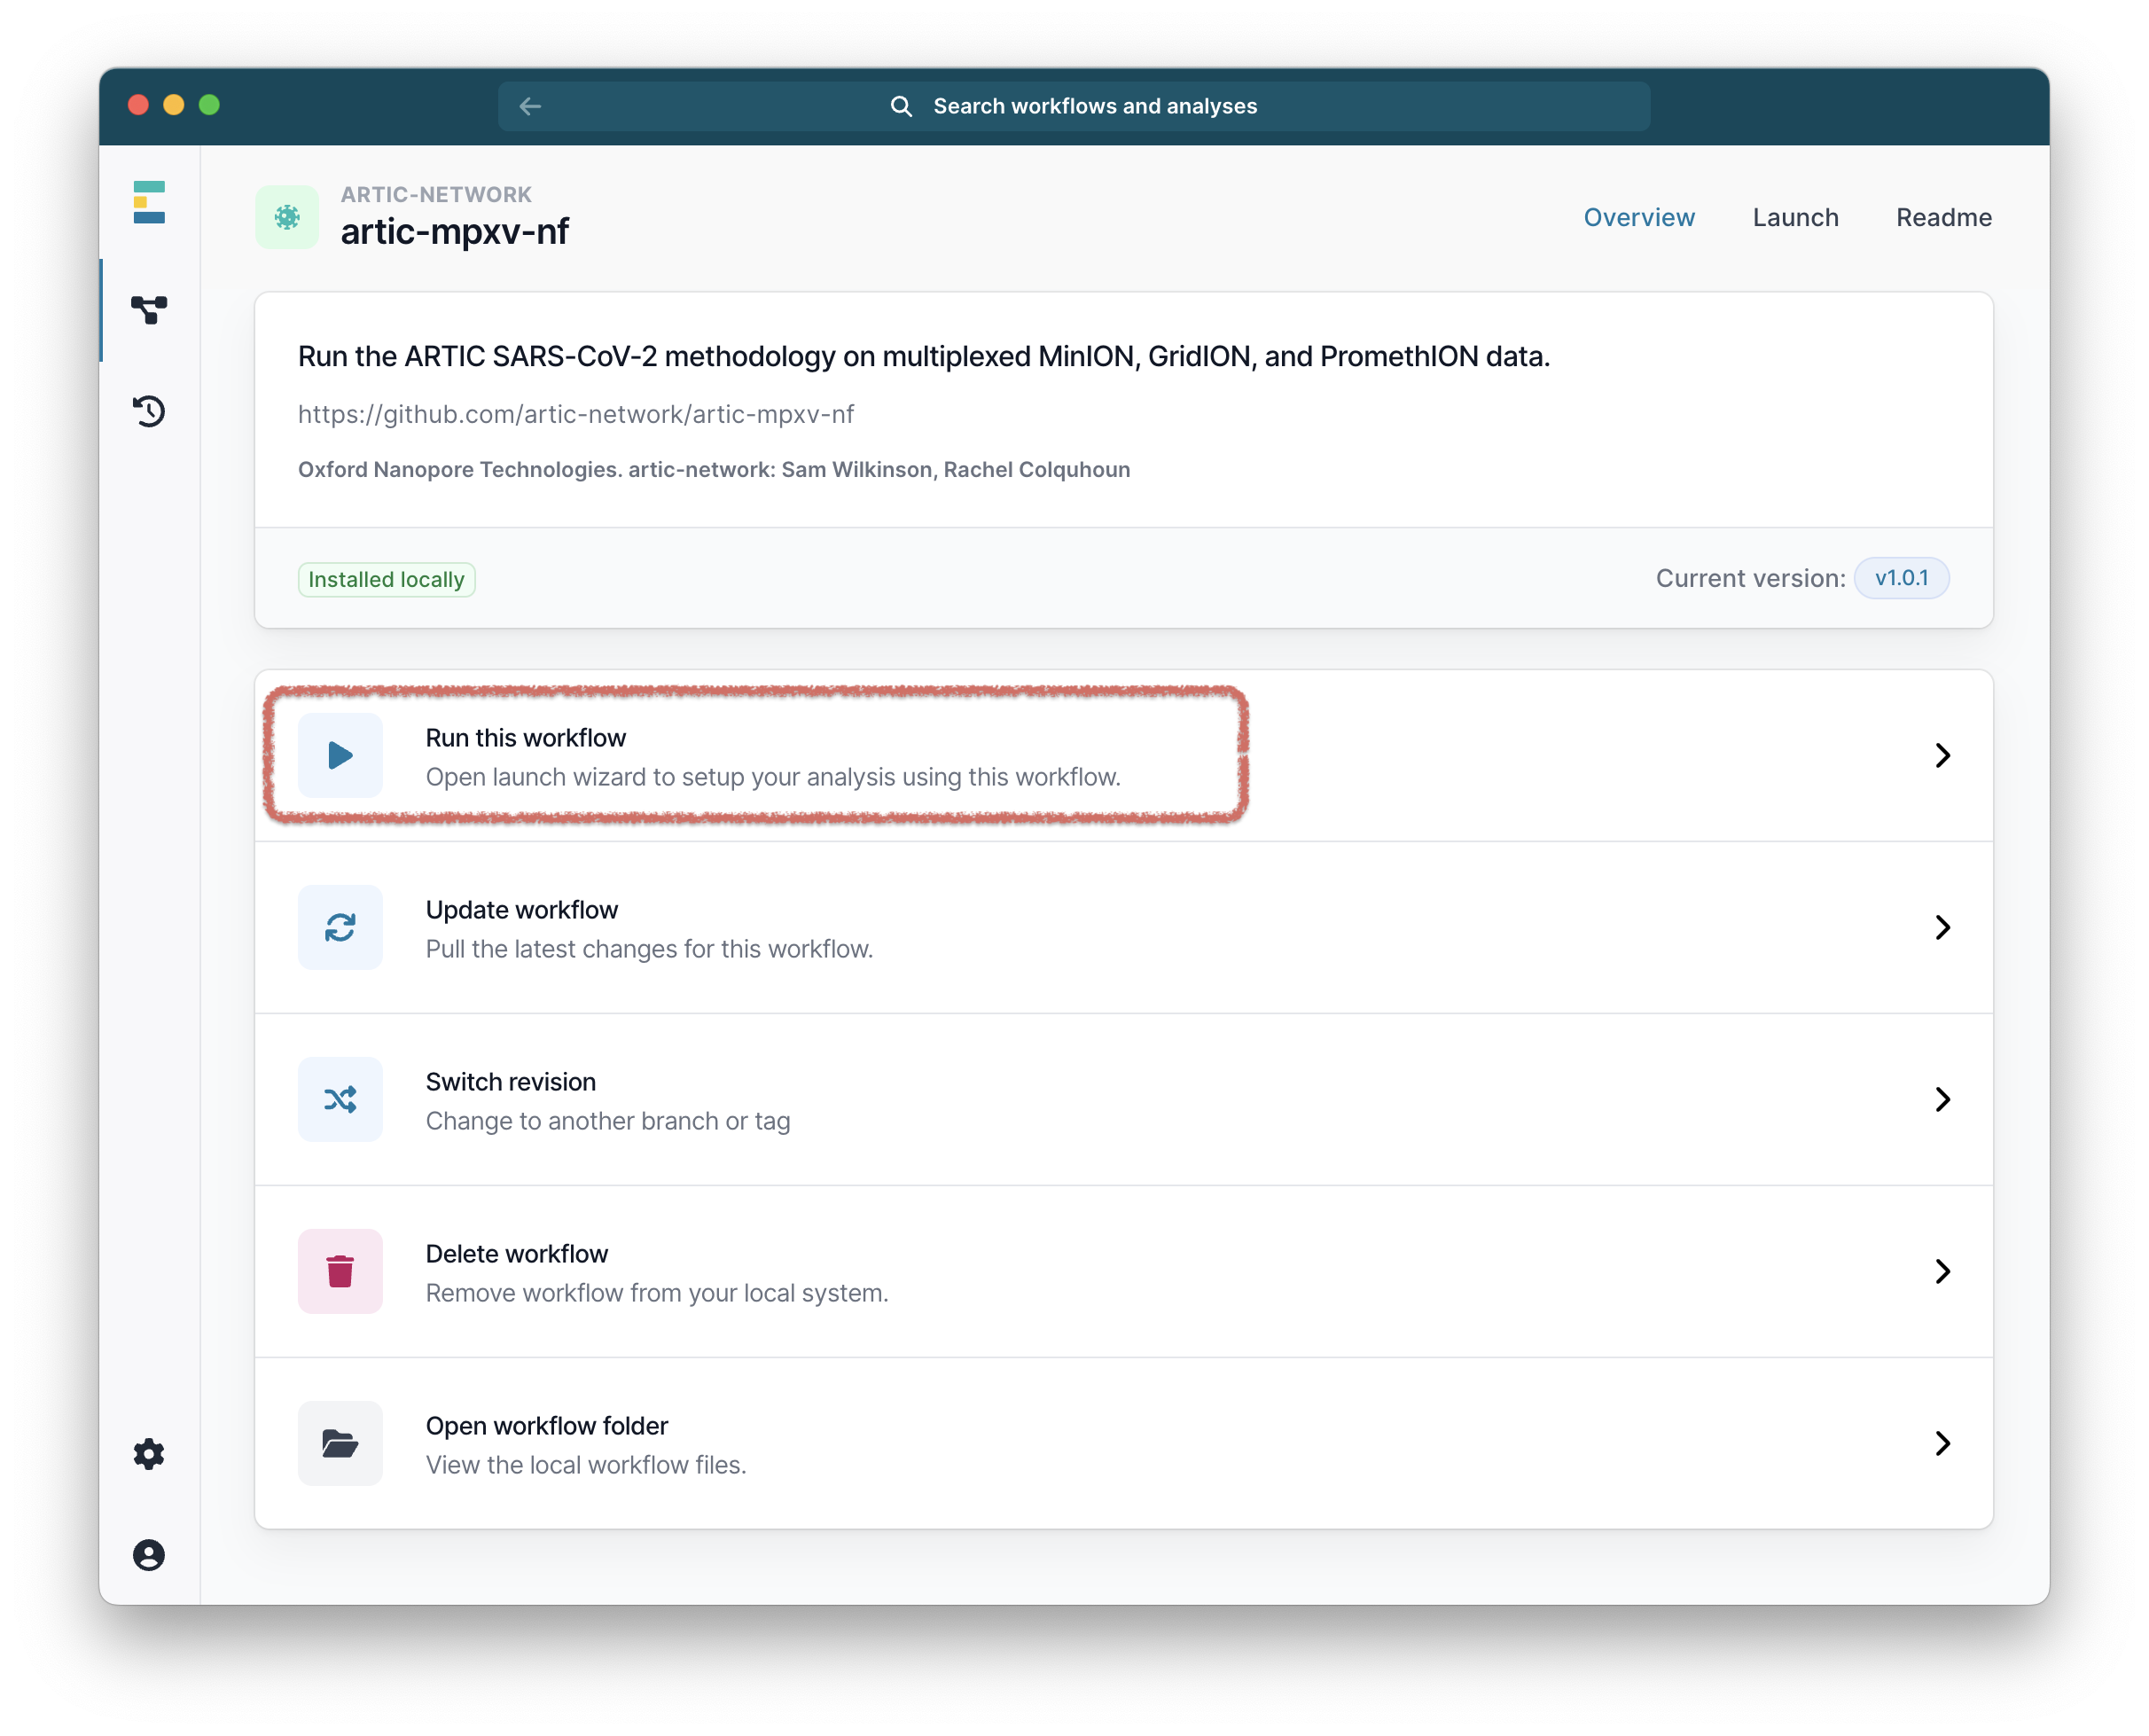
Once it has downloaded, it will be ready in the Available Workflows tab. Select it and you will be taken to a landing page for this workflow.
Running the workflow
From the workflow landing page, click “Run this workflow”.
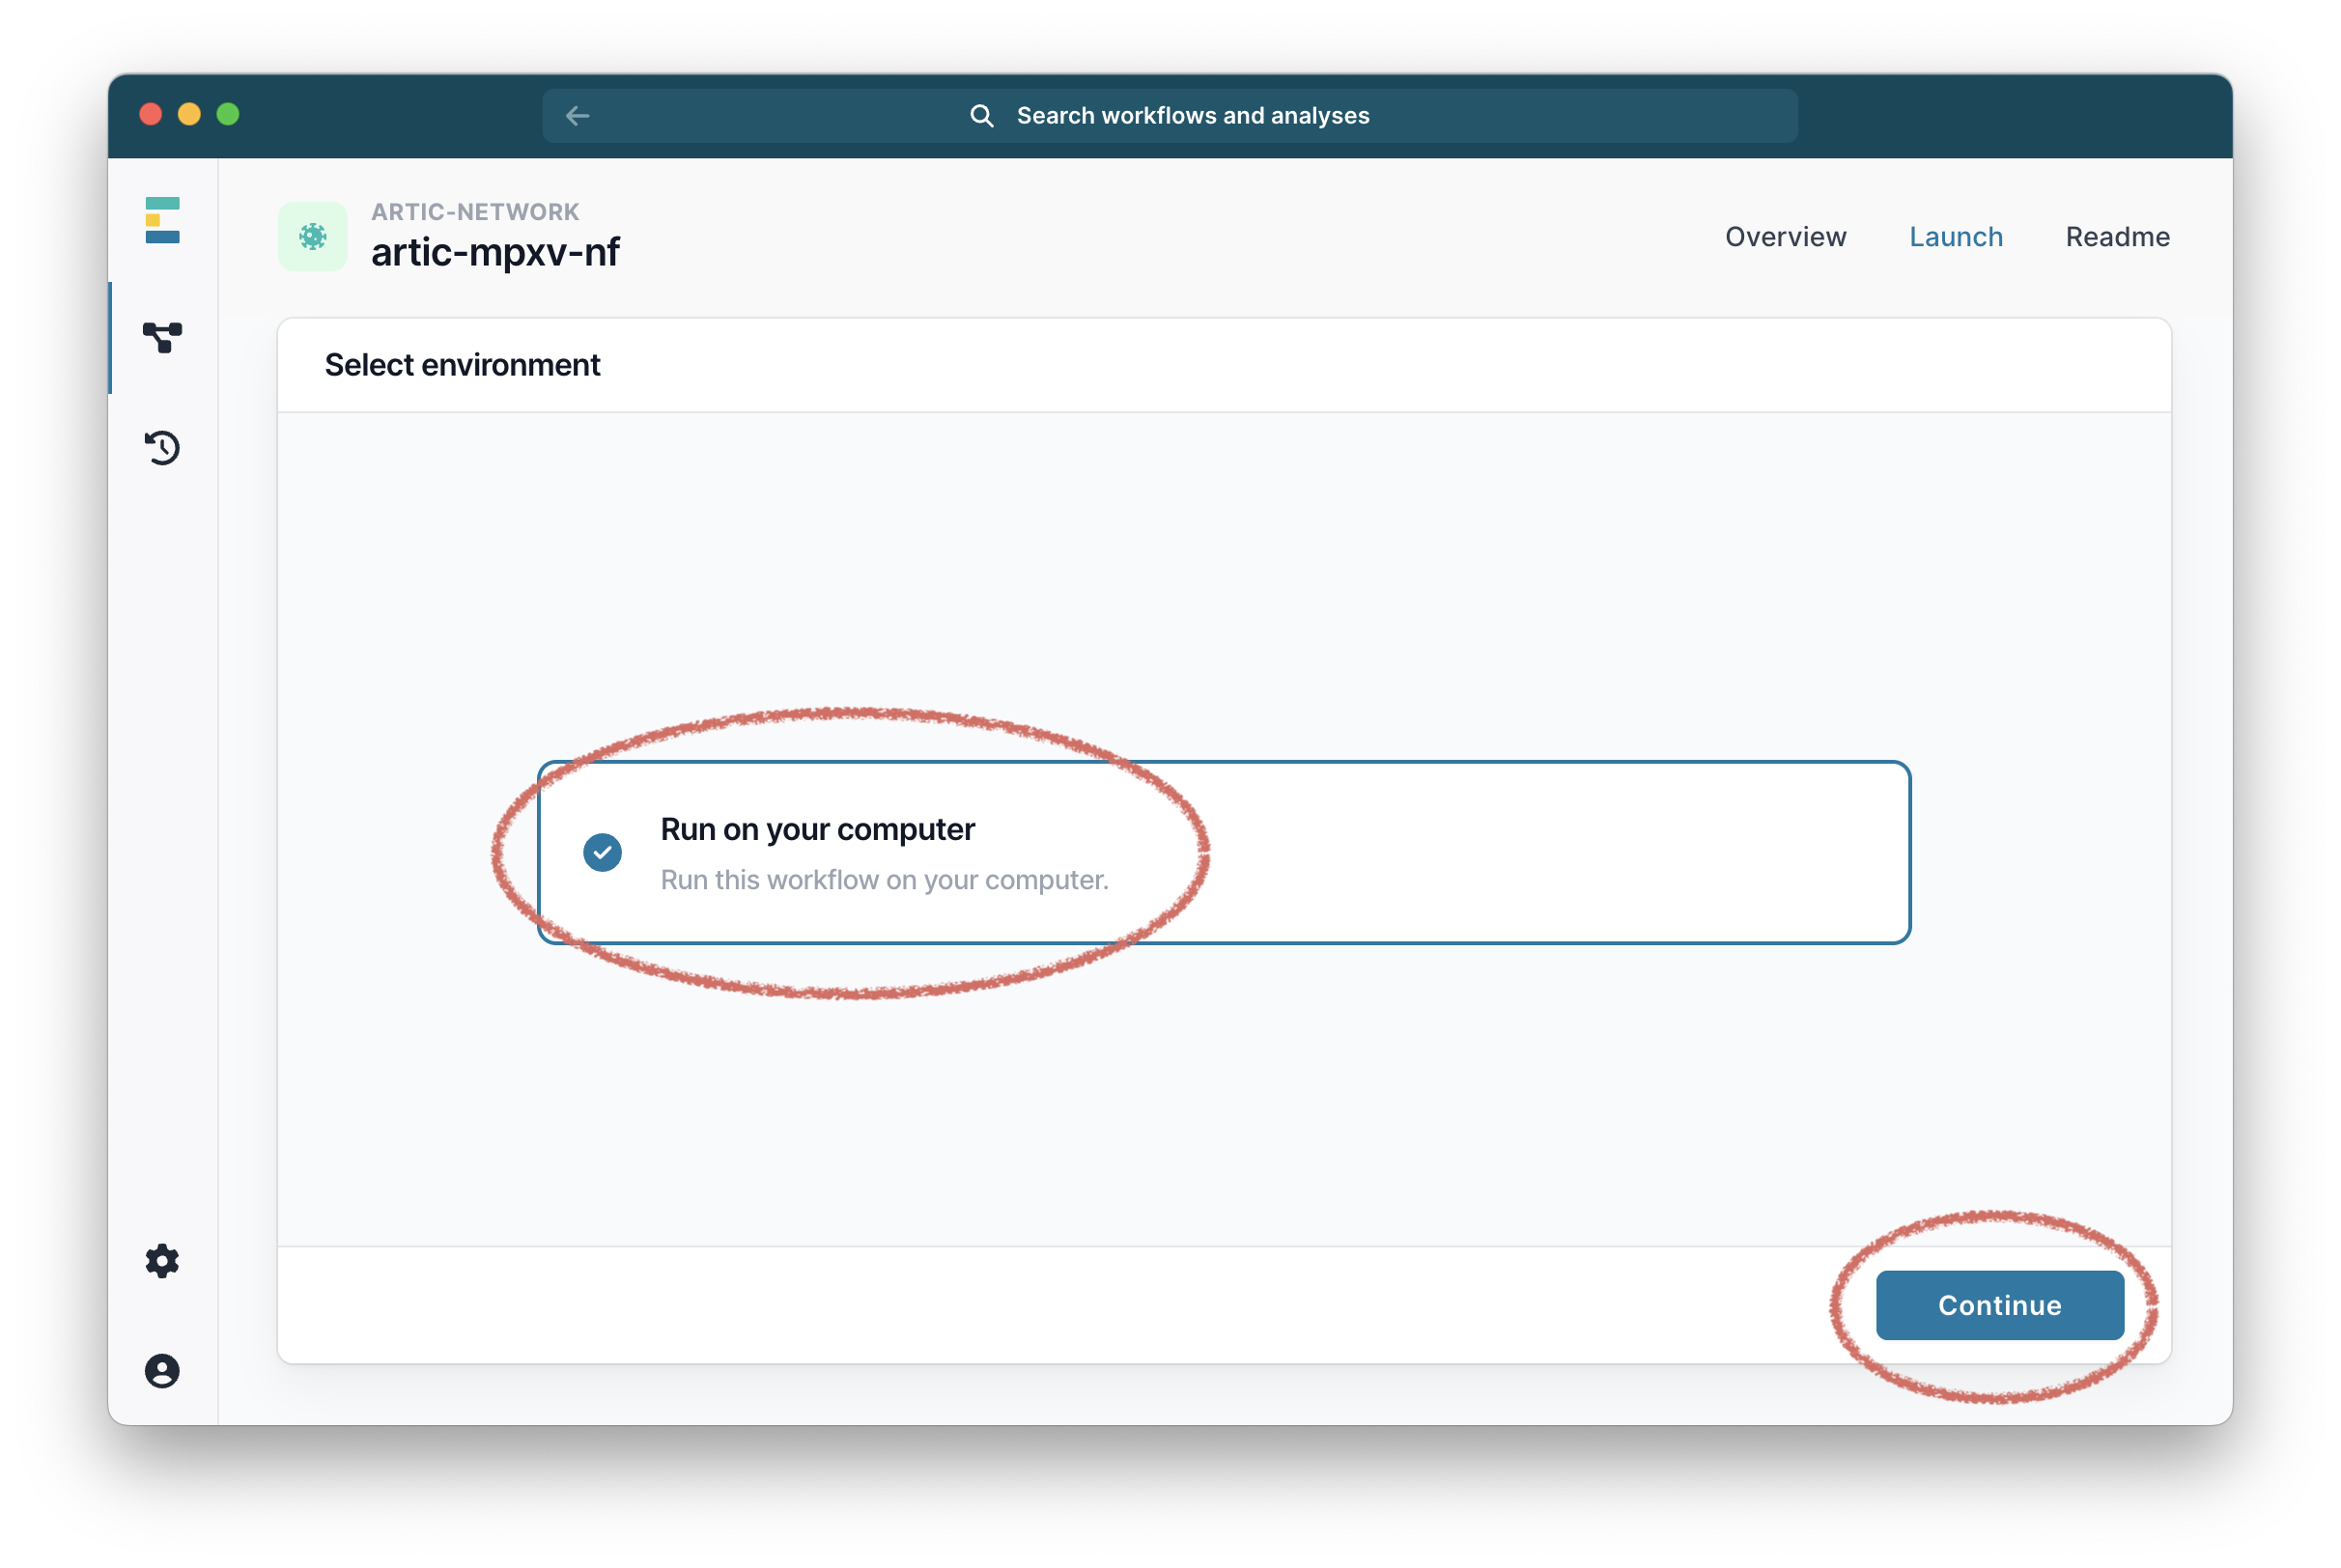
Then select “Run on your computer” and click “Continue”.
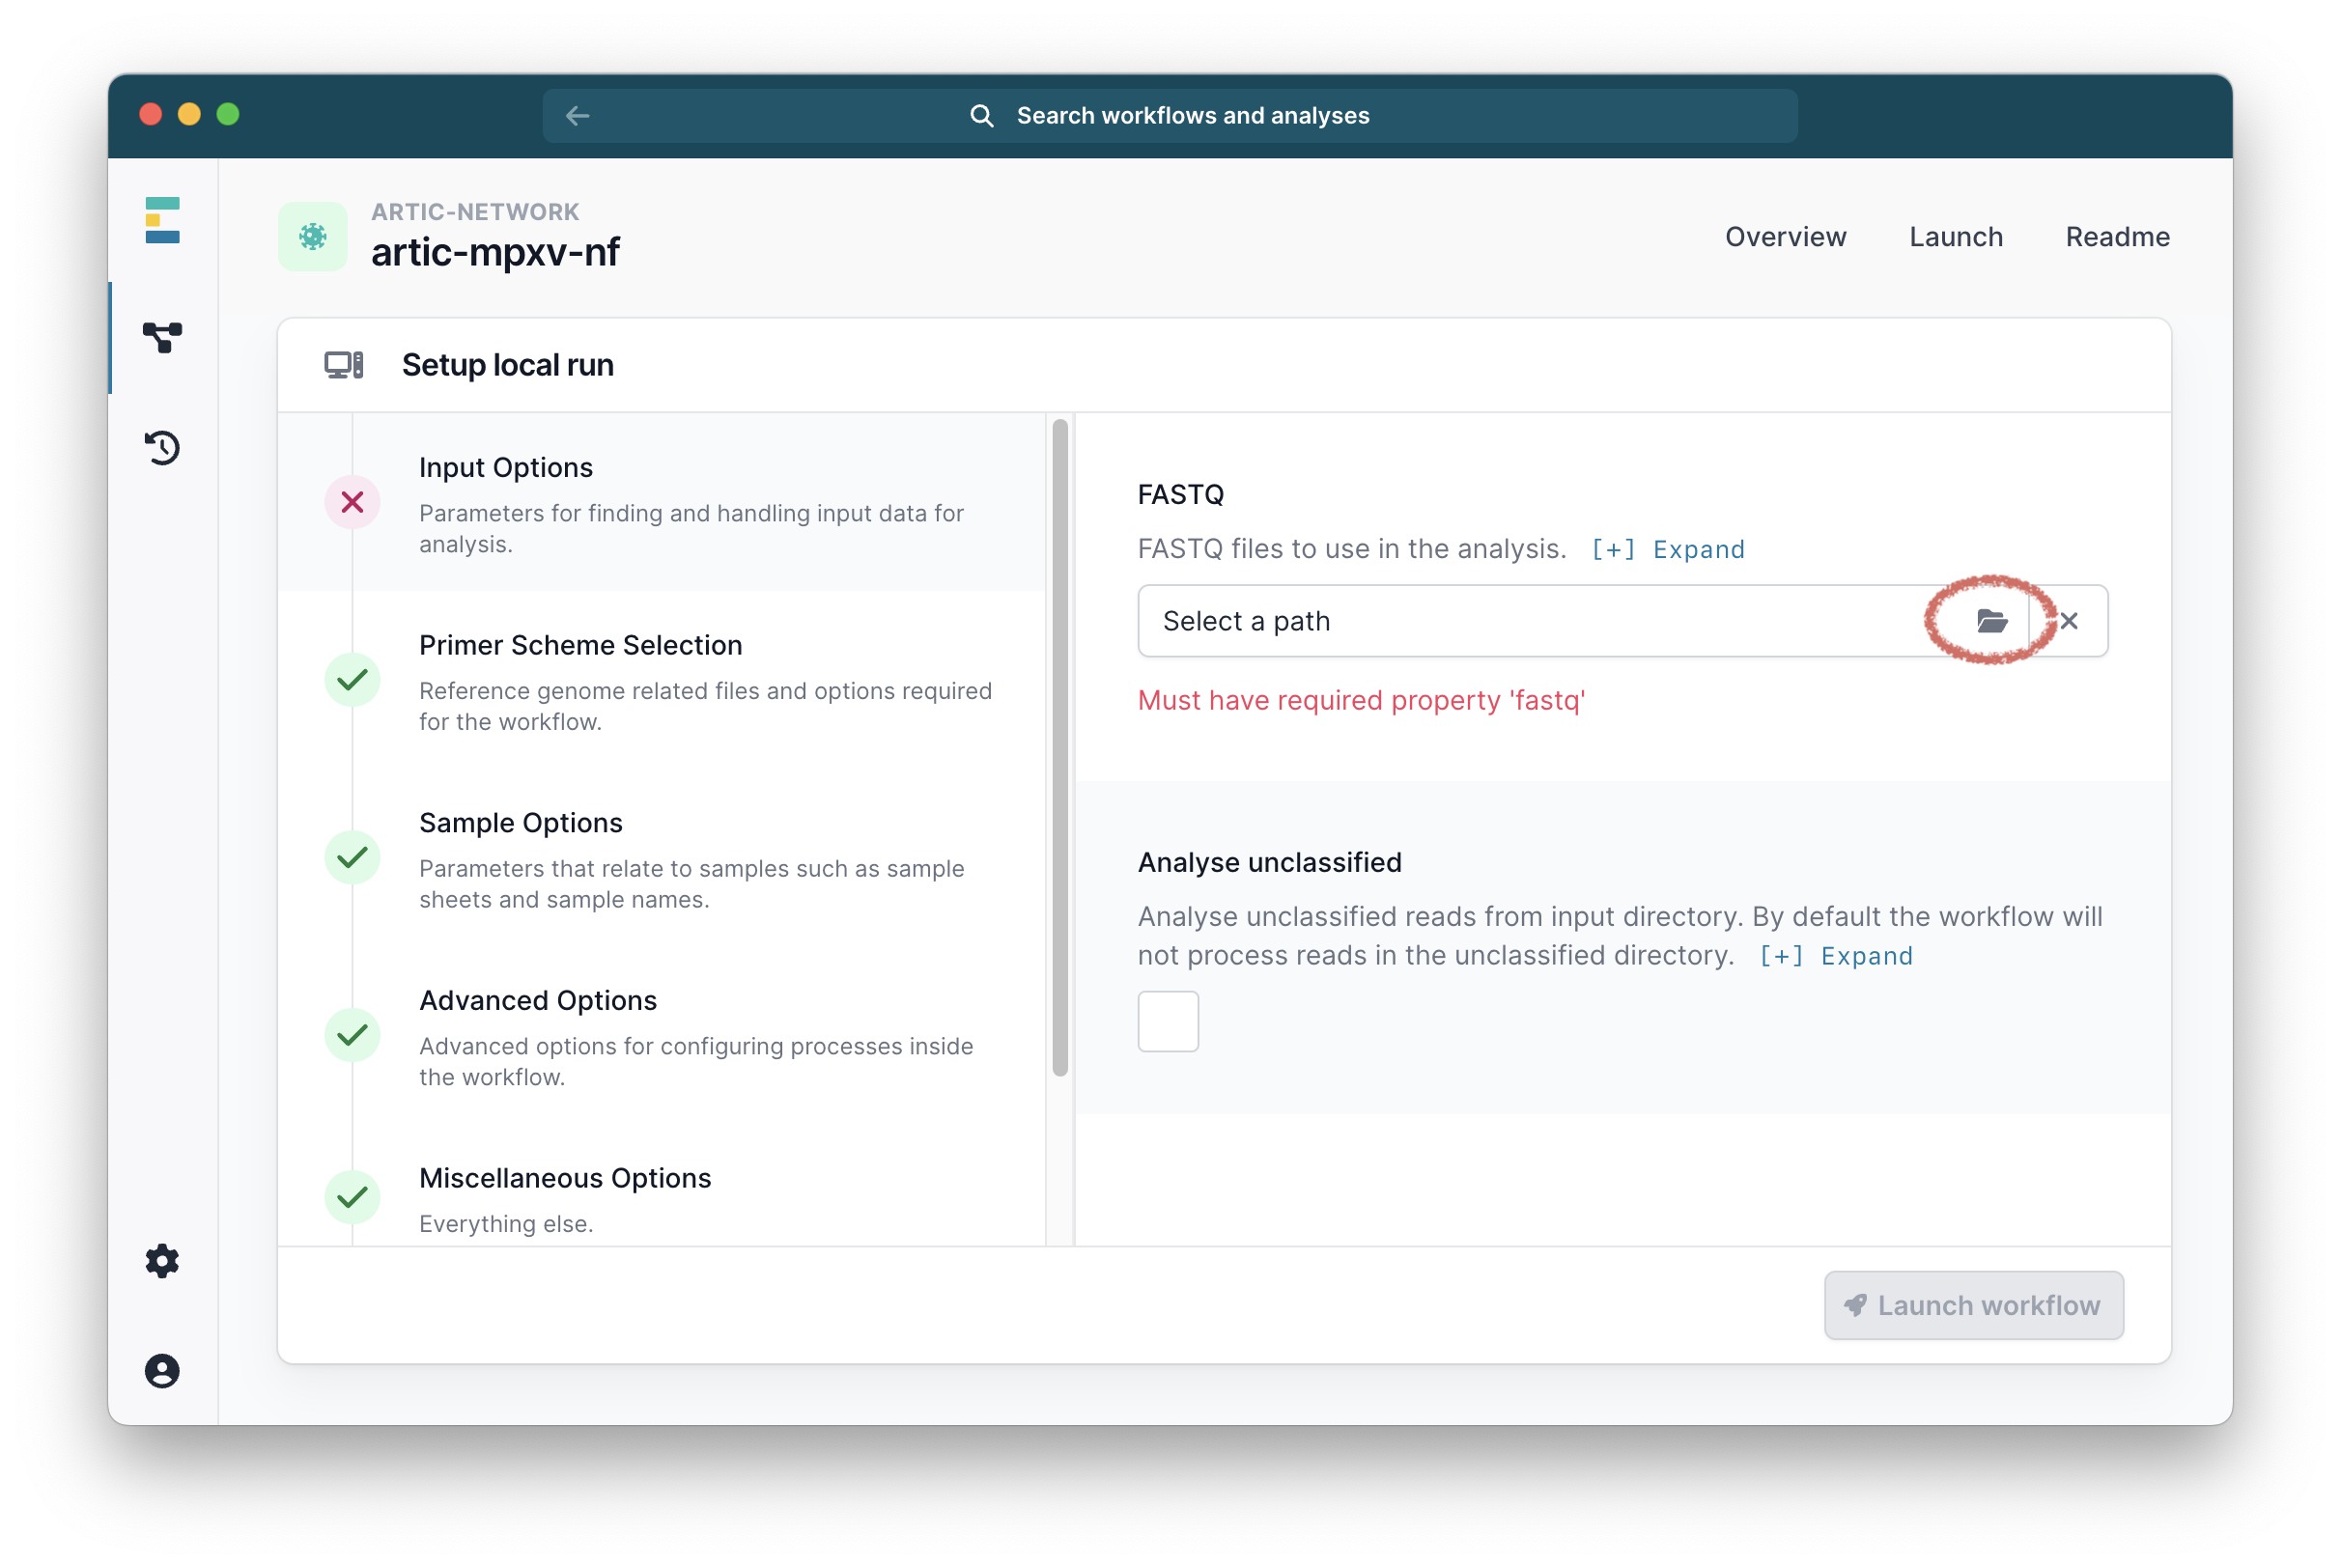
It will then ask you to select your fastq folders. Select the ones you want and continue.
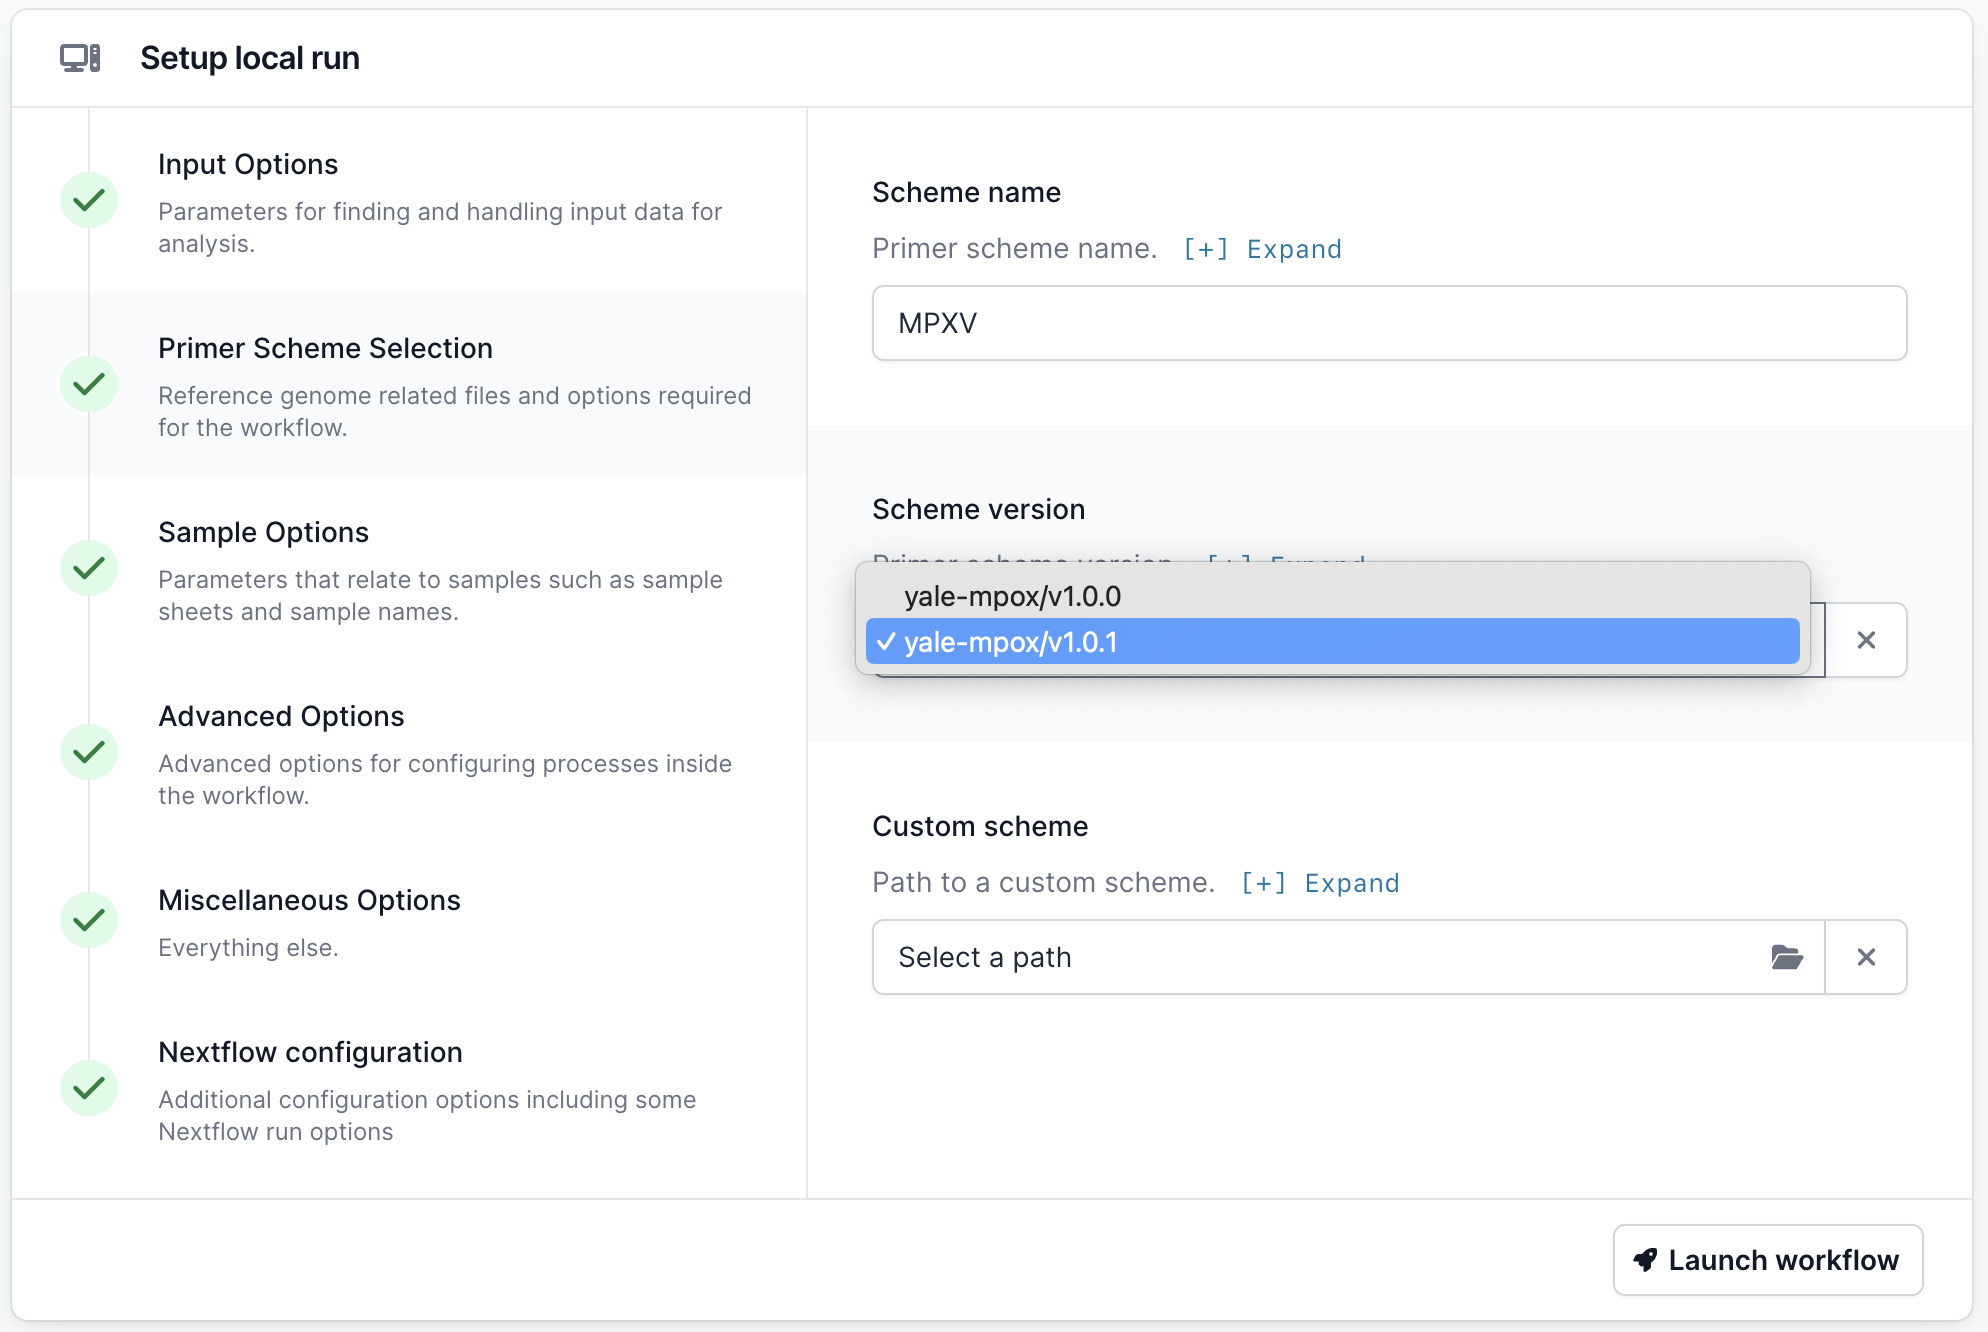
Go to the Primer Scheme Selection tab and make sure that the primer scheme matches the one you used. If your scheme is not listed, you can use the “Custom scheme” section to provide the full path to the directory containing your appropriately named scheme bed and fasta files; <SCHEME_NAME>.bed and <SCHEME_NAME>.fasta.
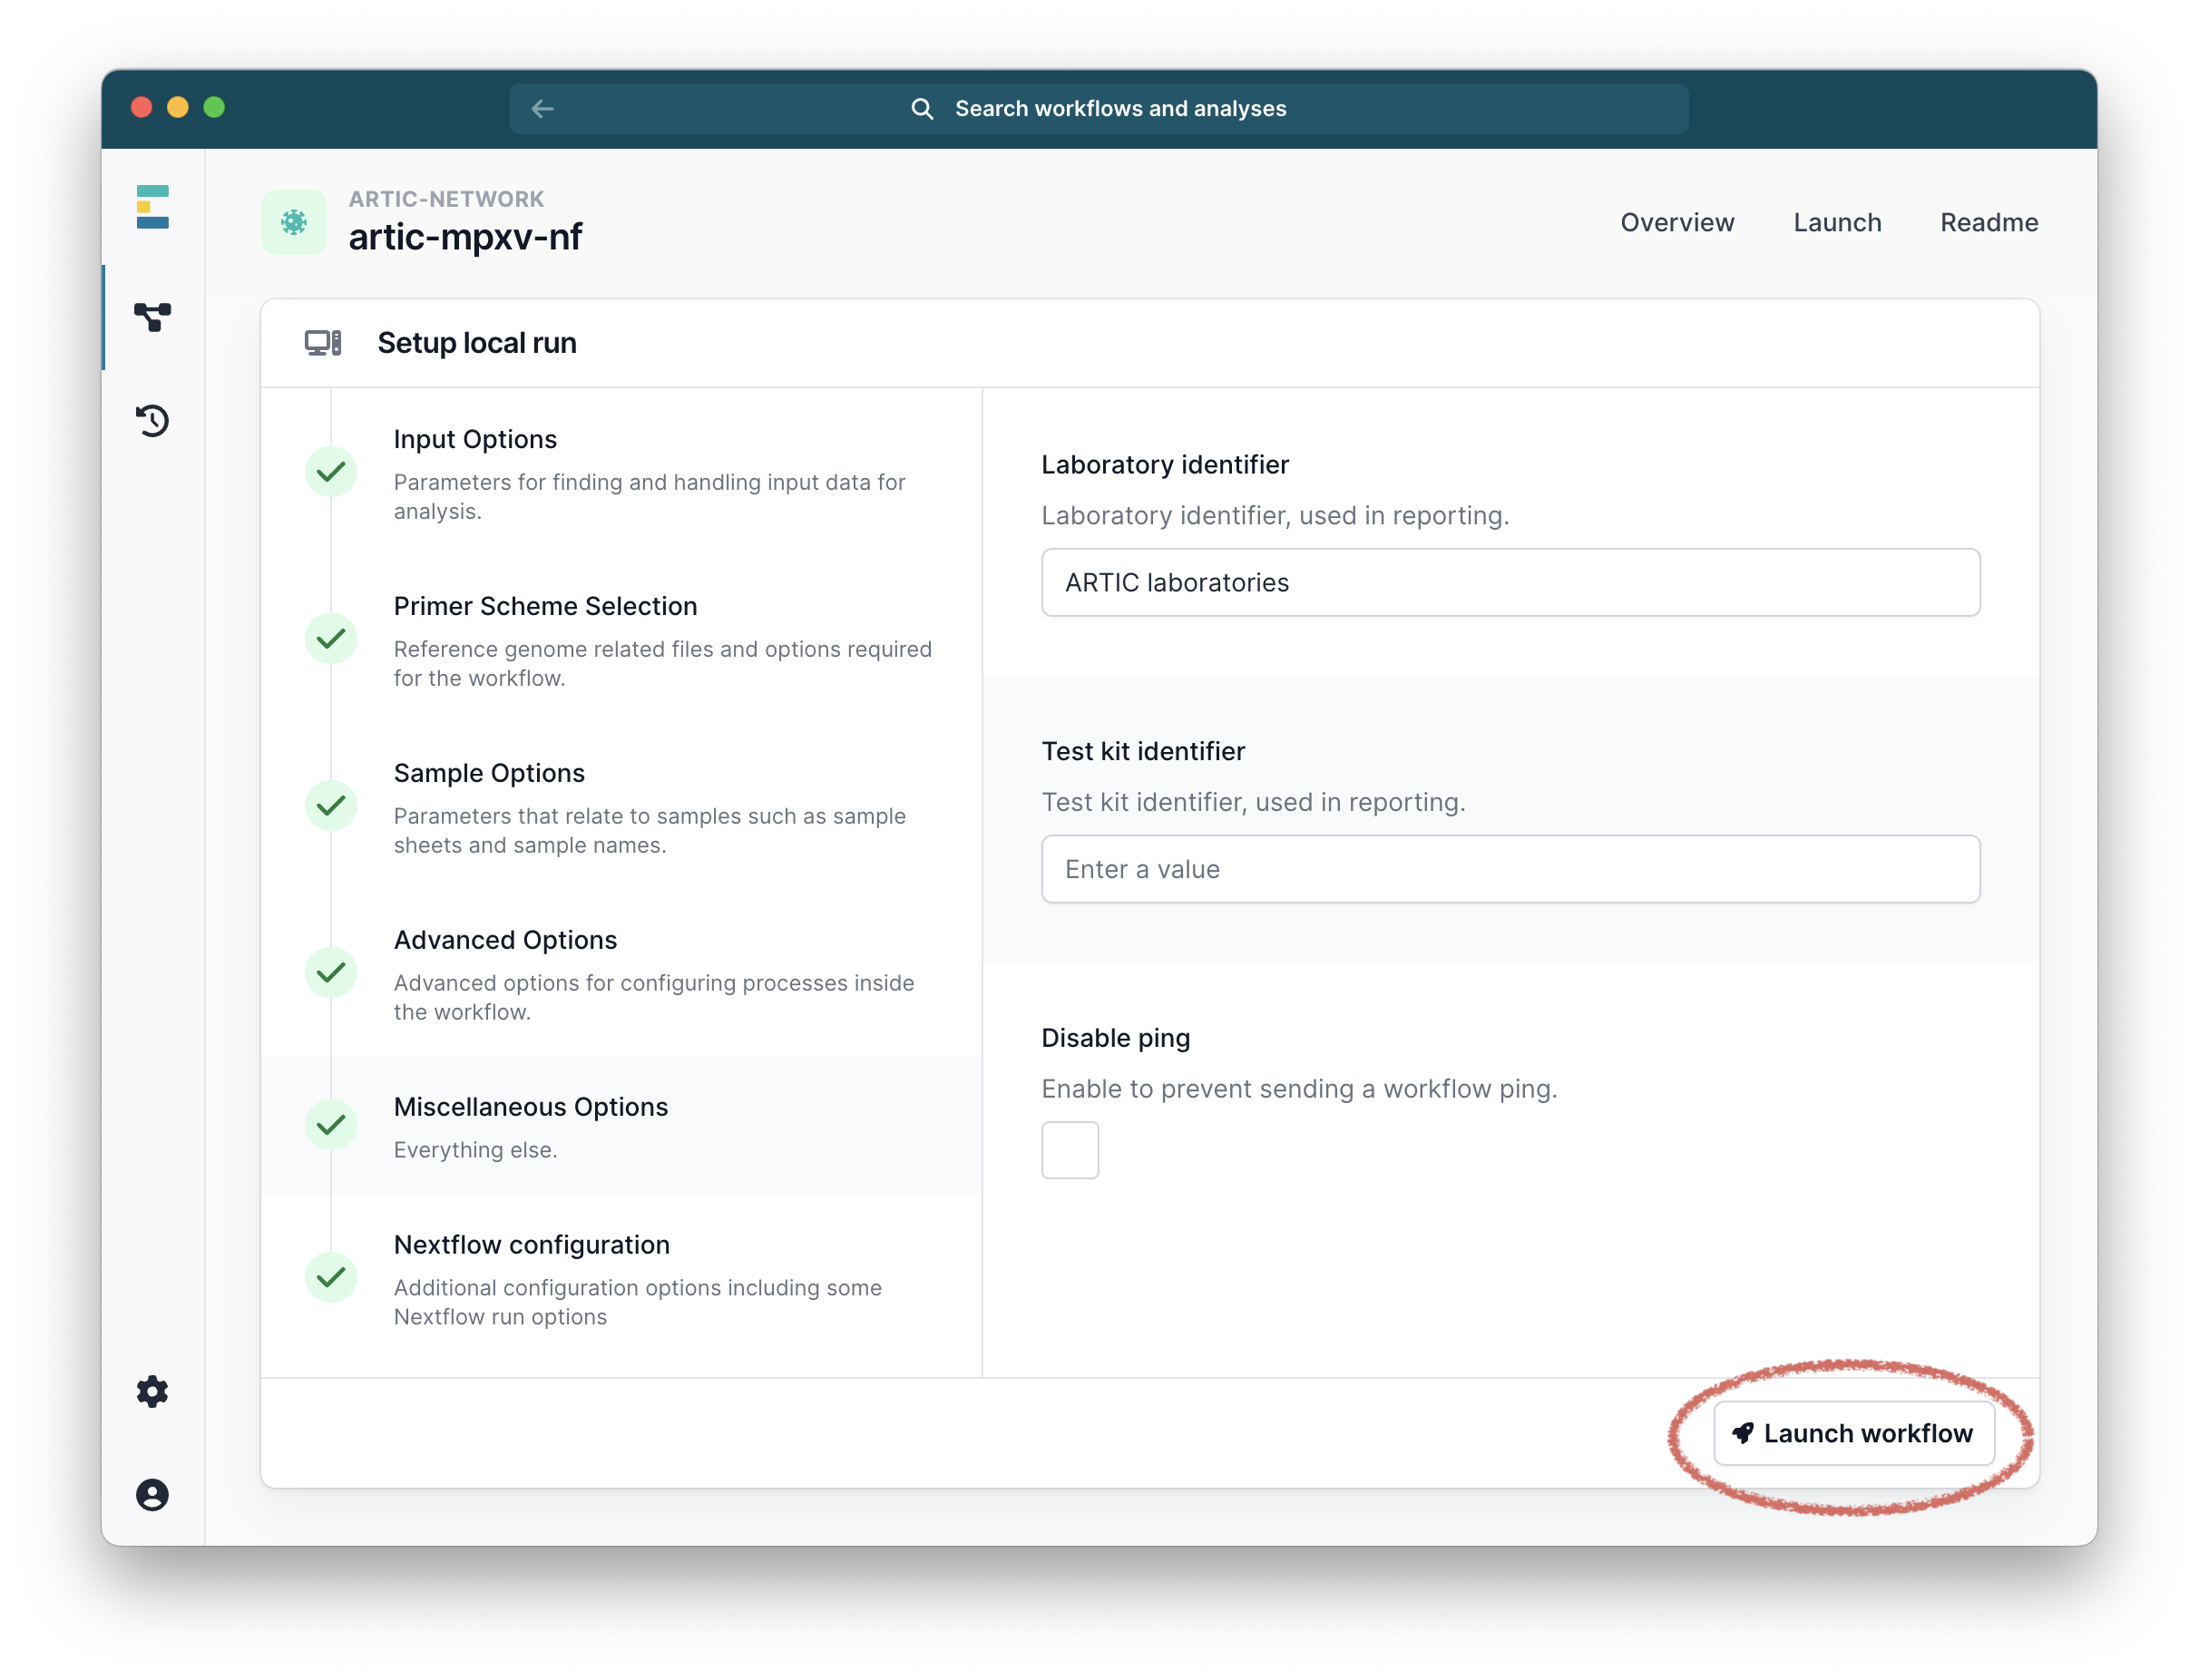
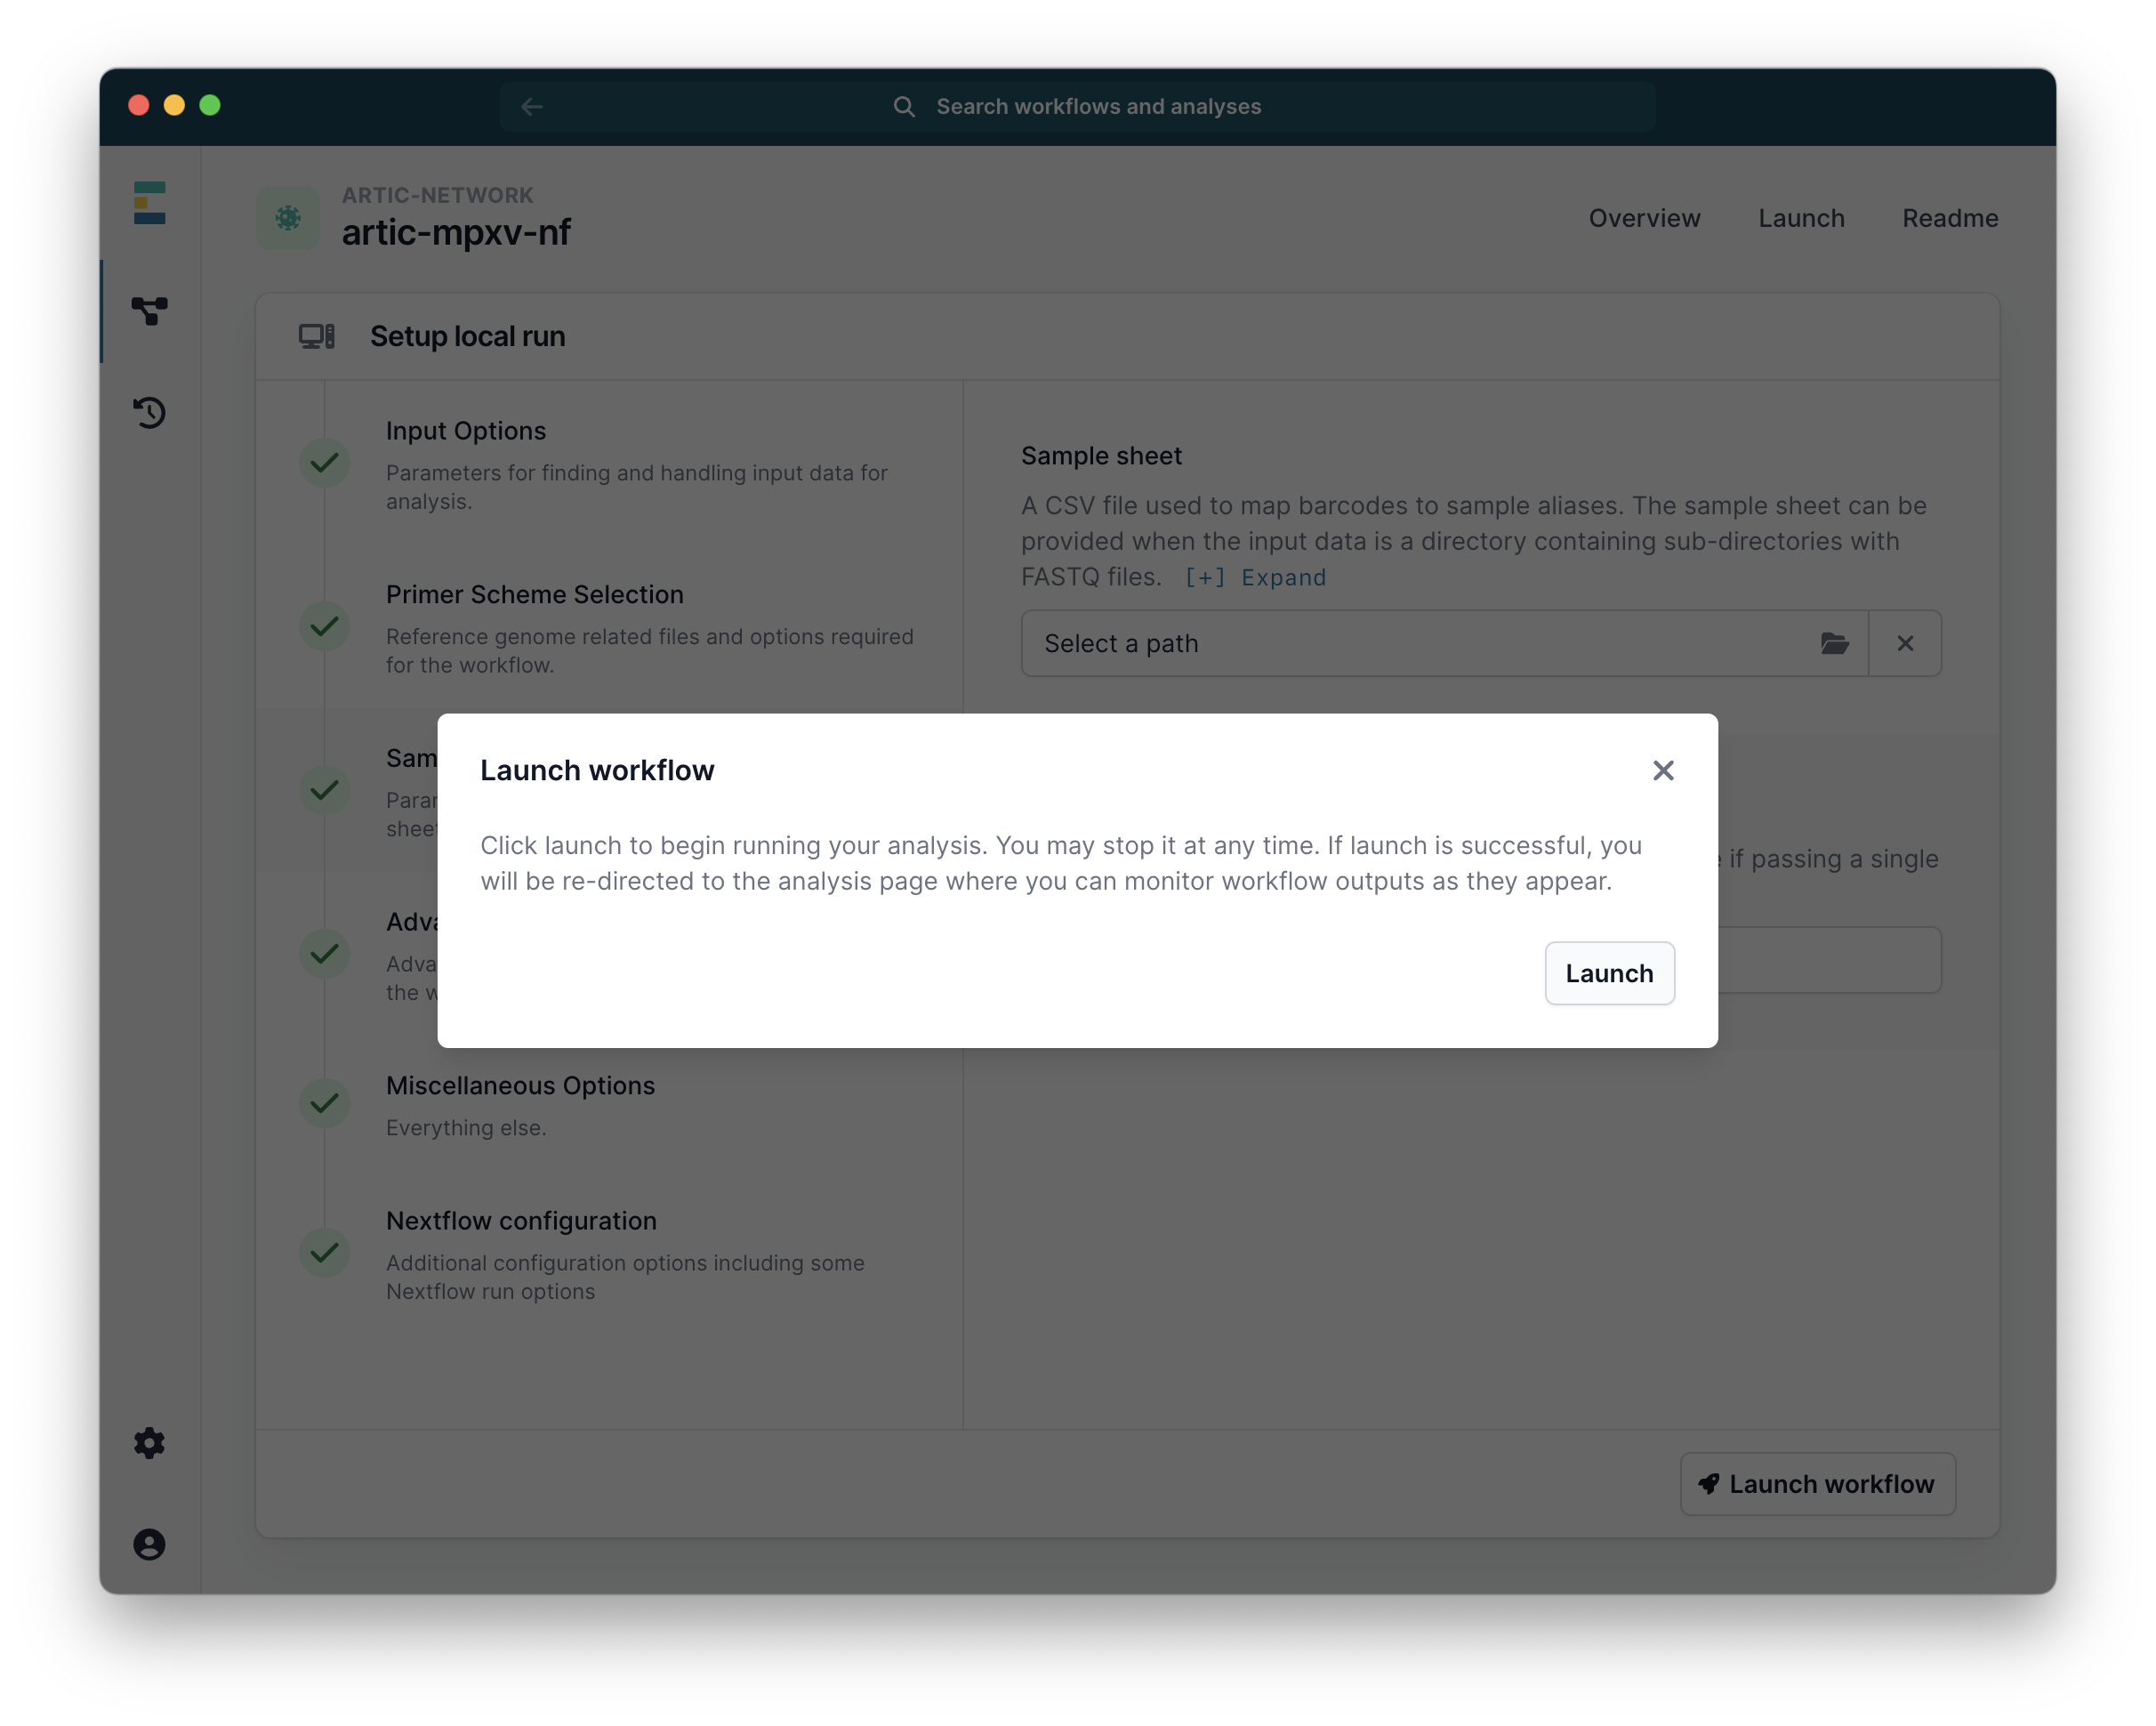
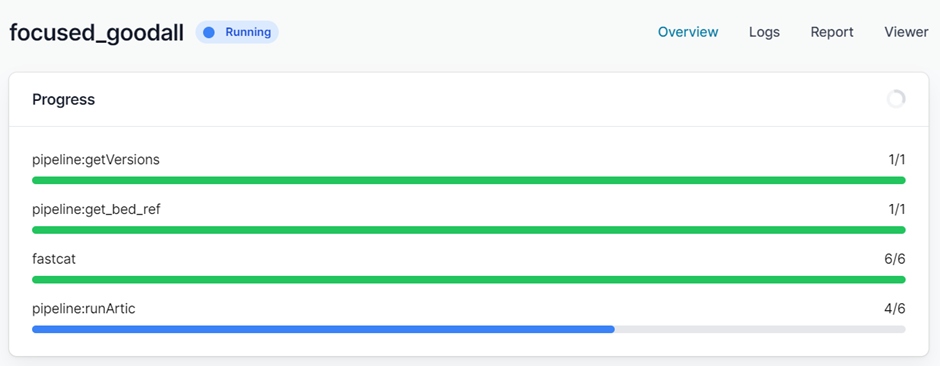
Finally click “Launch workflow”. It will then start running. The runtime will depend on the size of your files and the speed of your computer, but 10-30 minutes is common. While it is running you will see a series of progress bars, and at the top a blue ‘Running’ icon. This will change to green and ‘Complete’ when it has finished.
When it has finished you will have a collection of outputs for both consensus and individual barcodes.
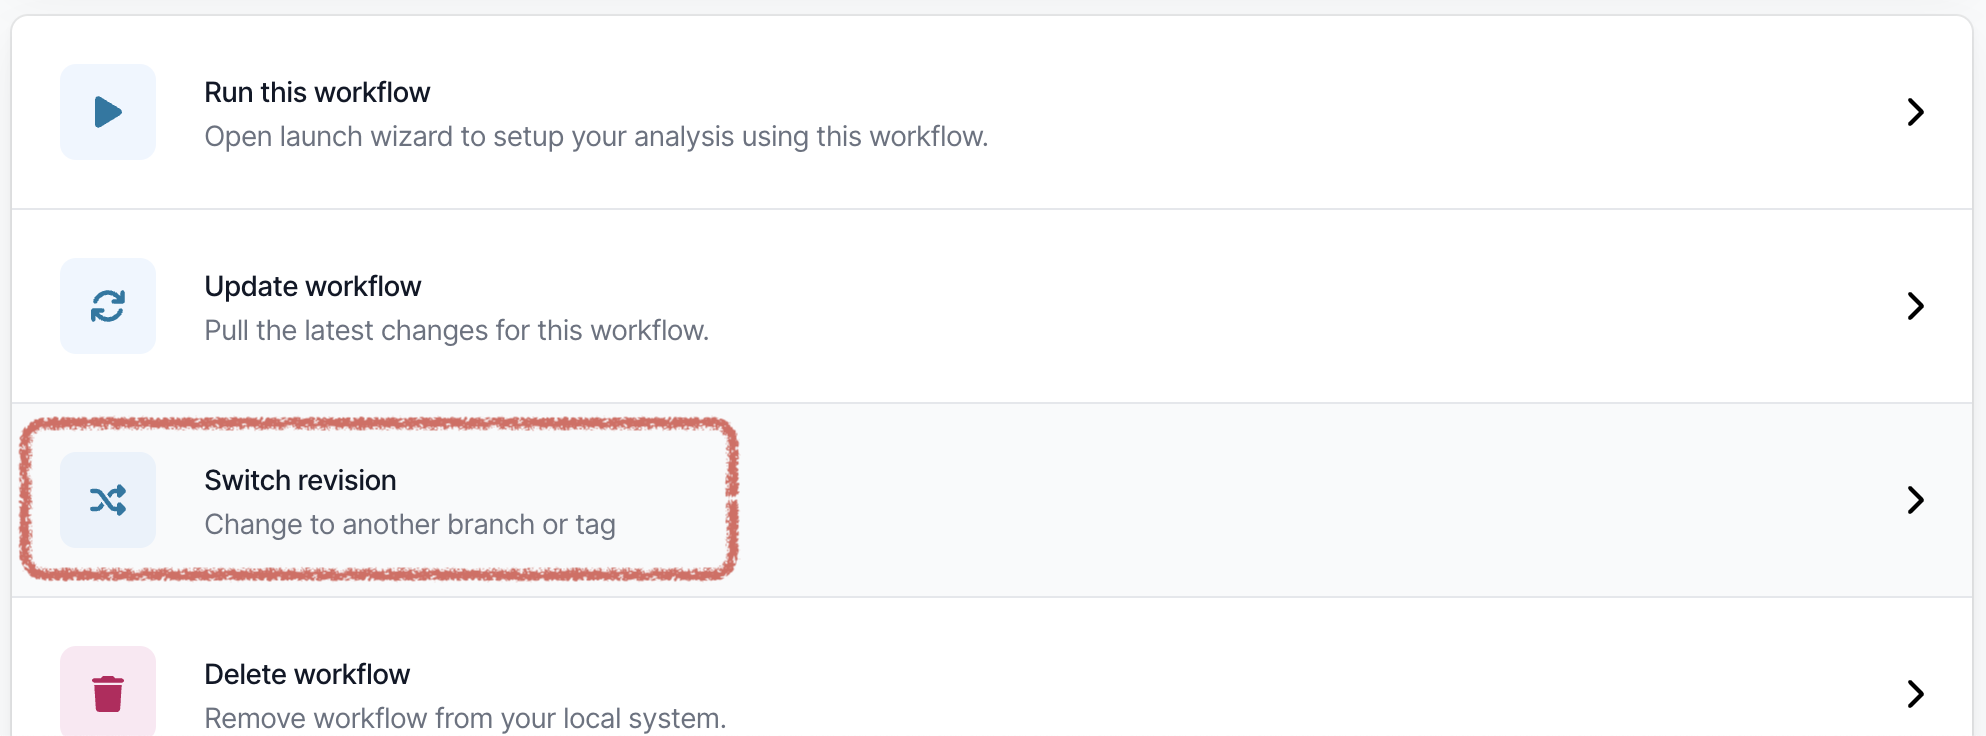
Advanced Options
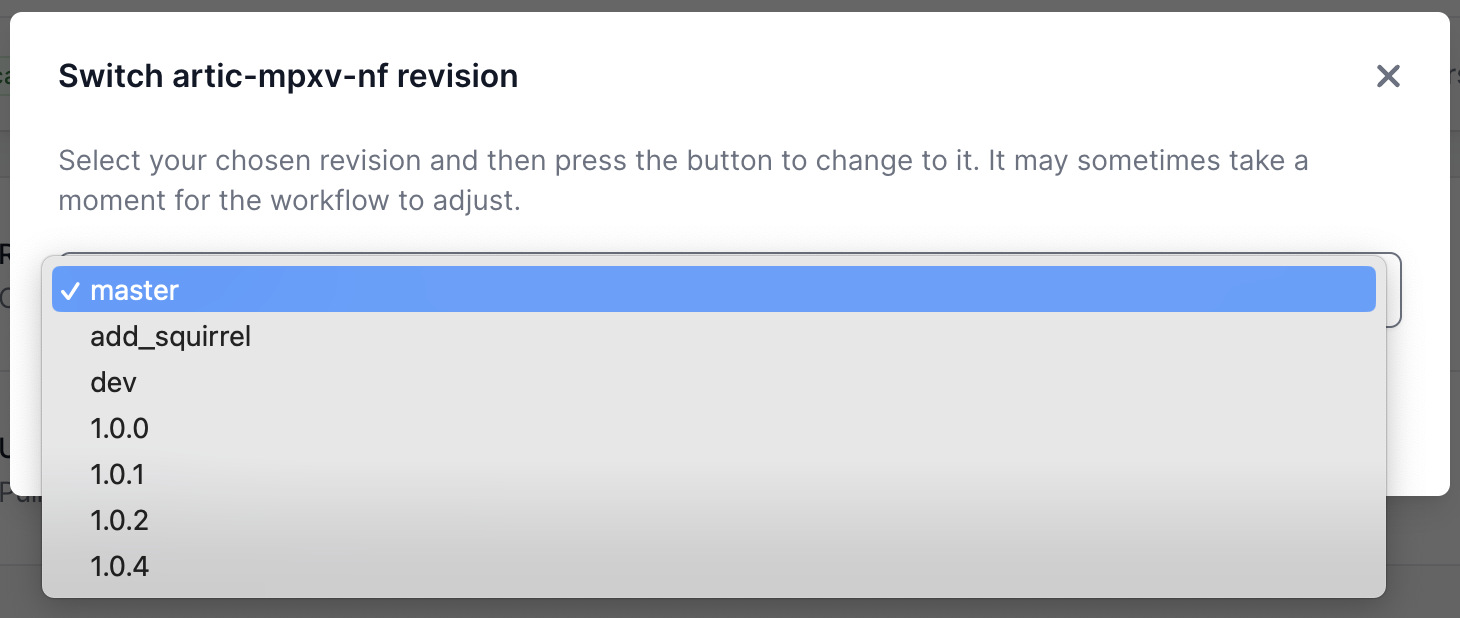
Changing the pipeline version
If you need to use a previous or a development version of the pipeline, this can be selected from the workflow landing page.
Changing the basecaller
Medaka runs within the pipeline to call variants between the reads provided and the reference. It will try to auto-select. If it is unable to auto-select (for example if your data was basecalled with a version of MinKNOW which is no longer supported) you may need to choose an option from this drop down list of available models in “Advance Options” (scroll down).
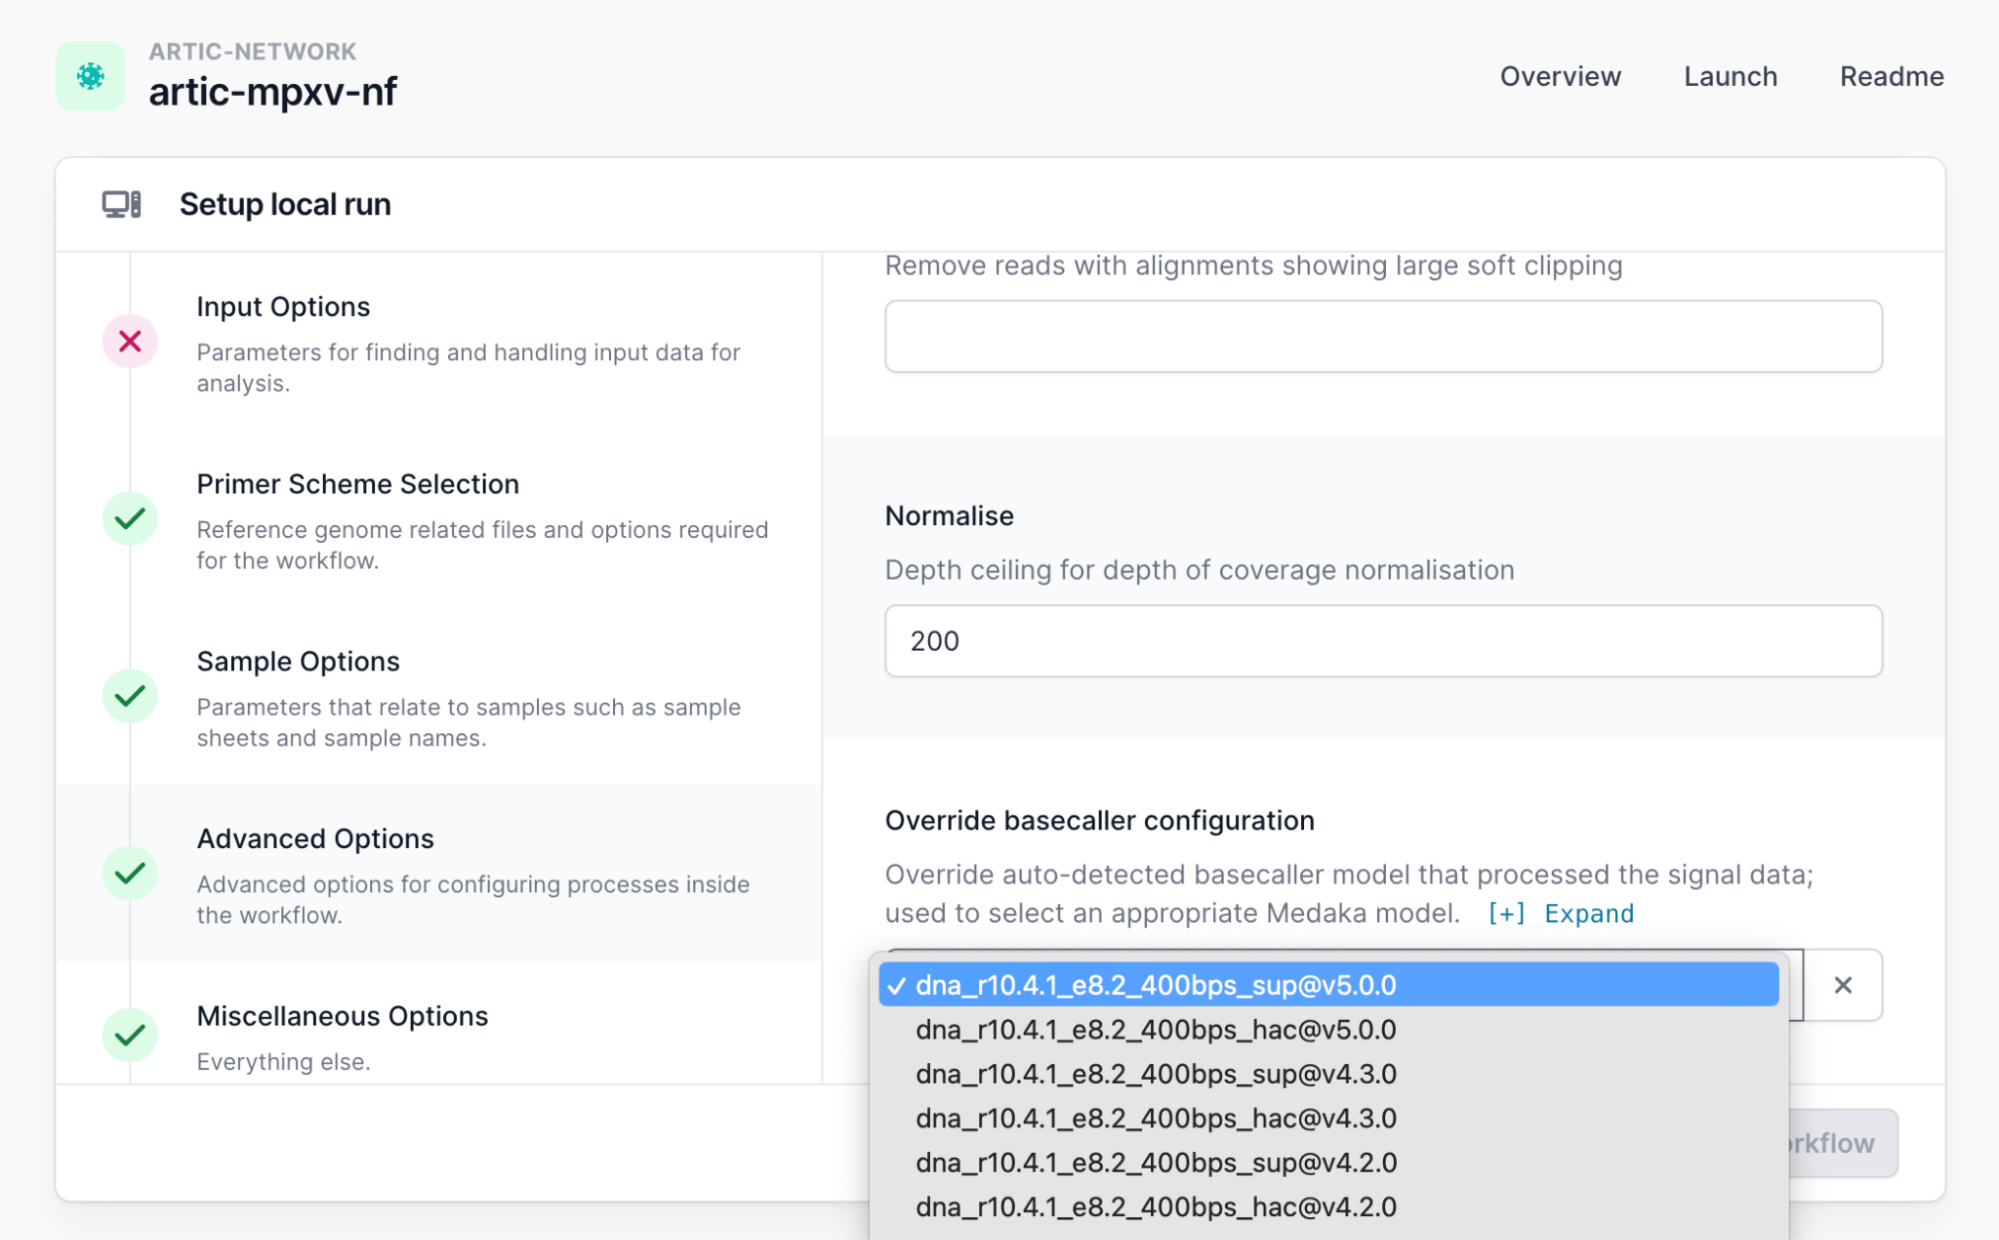
We recommend you use a supported version of MinKNOW. As a work around, you should select an option from this list of models which matches the flowcell chemistry and sequencing speed.