Running a bioinformatics pipeline for Illumina data using EPI2ME
ARTIC pipelines | bioinformatics
| Document: | ARTIC-MPXV-Illumina-bioinformatics-EPI2ME-SOP-v1.0 |
| Creation Date: | 2024-08-22 |
| Revision Date: | 2024-11-12 |
| Author: | Lauren Lansdowne, Sam Wilkinson |
| Licence: | Creative Commons Attribution 4.0 International License |
Credits / Acknowledgements
This pipeline is based on the BCCDC-PHL/ncov2019-artic-nf pipeline, which is a fork of the connor-lab/ncov2019-artic-nf pipeline. It has been modified here to support analysis of monkeypox virus. This pipeline is possible due to the ongoing efforts of many people developing and maintaining bioinformatics software. For a complete list of acknowledgments please see the documentation on the pipeline Github repository: https://github.com/artic-network/artic-mpxv-nf
Using the ARTIC MPXV analysis pipeline in EPI2ME
Requirements:
- A working installation of EPI2ME. For instructions for installing EPI2ME, see this document.
- Internet access to download the pipeline, and for the first time running it. After that, you should be able to run it offline.
- Details about how the data was generated including the primer scheme used.
Import the workflow
Open EPI2ME. On the main dashboard select “View workflows”:

Then select “Import Workflow”:

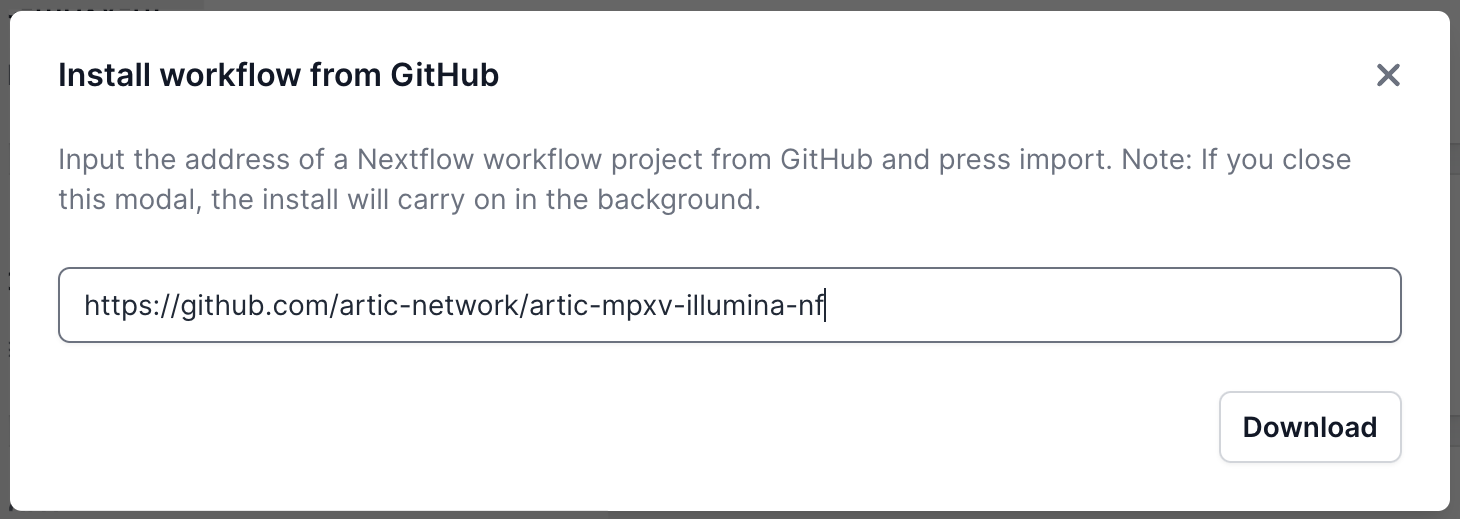
A pop-up window will appear where you can enter the GitHub URL. Enter the URL and click “Download” (https://github.com/artic-network/artic-mpxv-illumina-nf ):
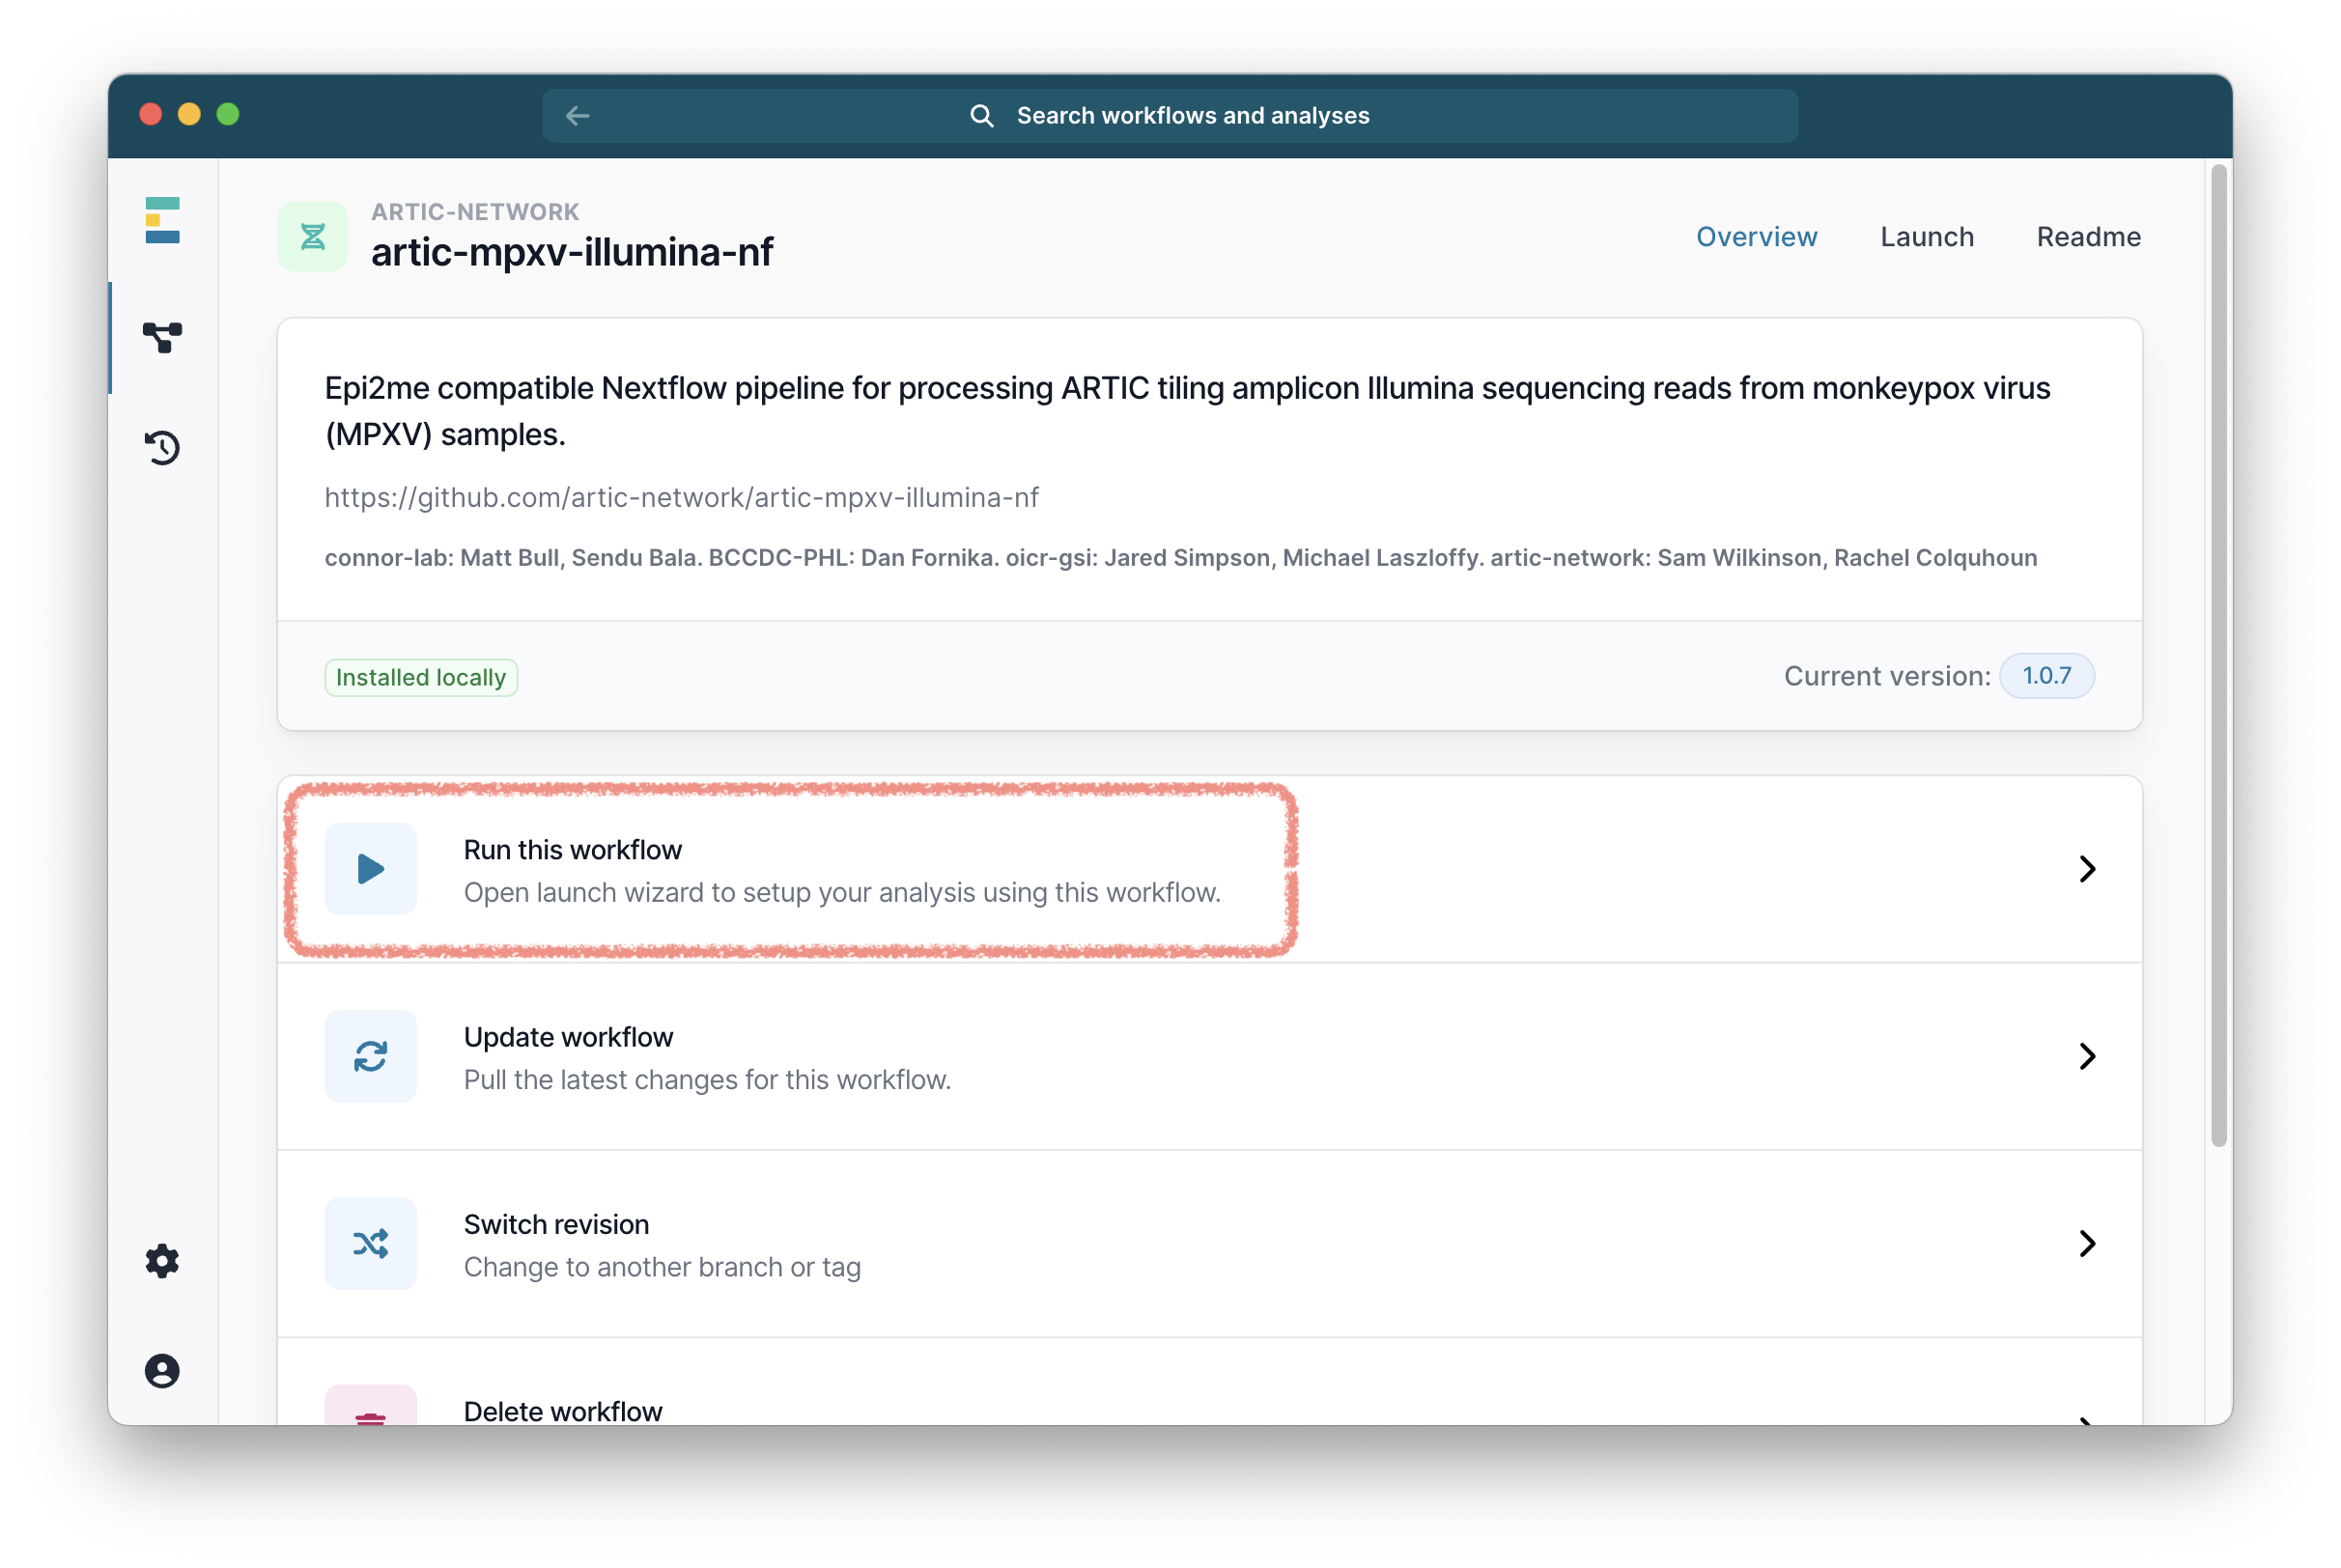
Once it has downloaded, it will be ready in the Installed tab. Select it and you will be taken to a landing page for this workflow.
Running the workflow
From the workflow landing page, click “Run this workflow”.
Then select “Run on your computer” and click “Continue”.

It will then ask you to select your fastq folders under the tab ‘Input Options’. Select the ones you want to analyse.
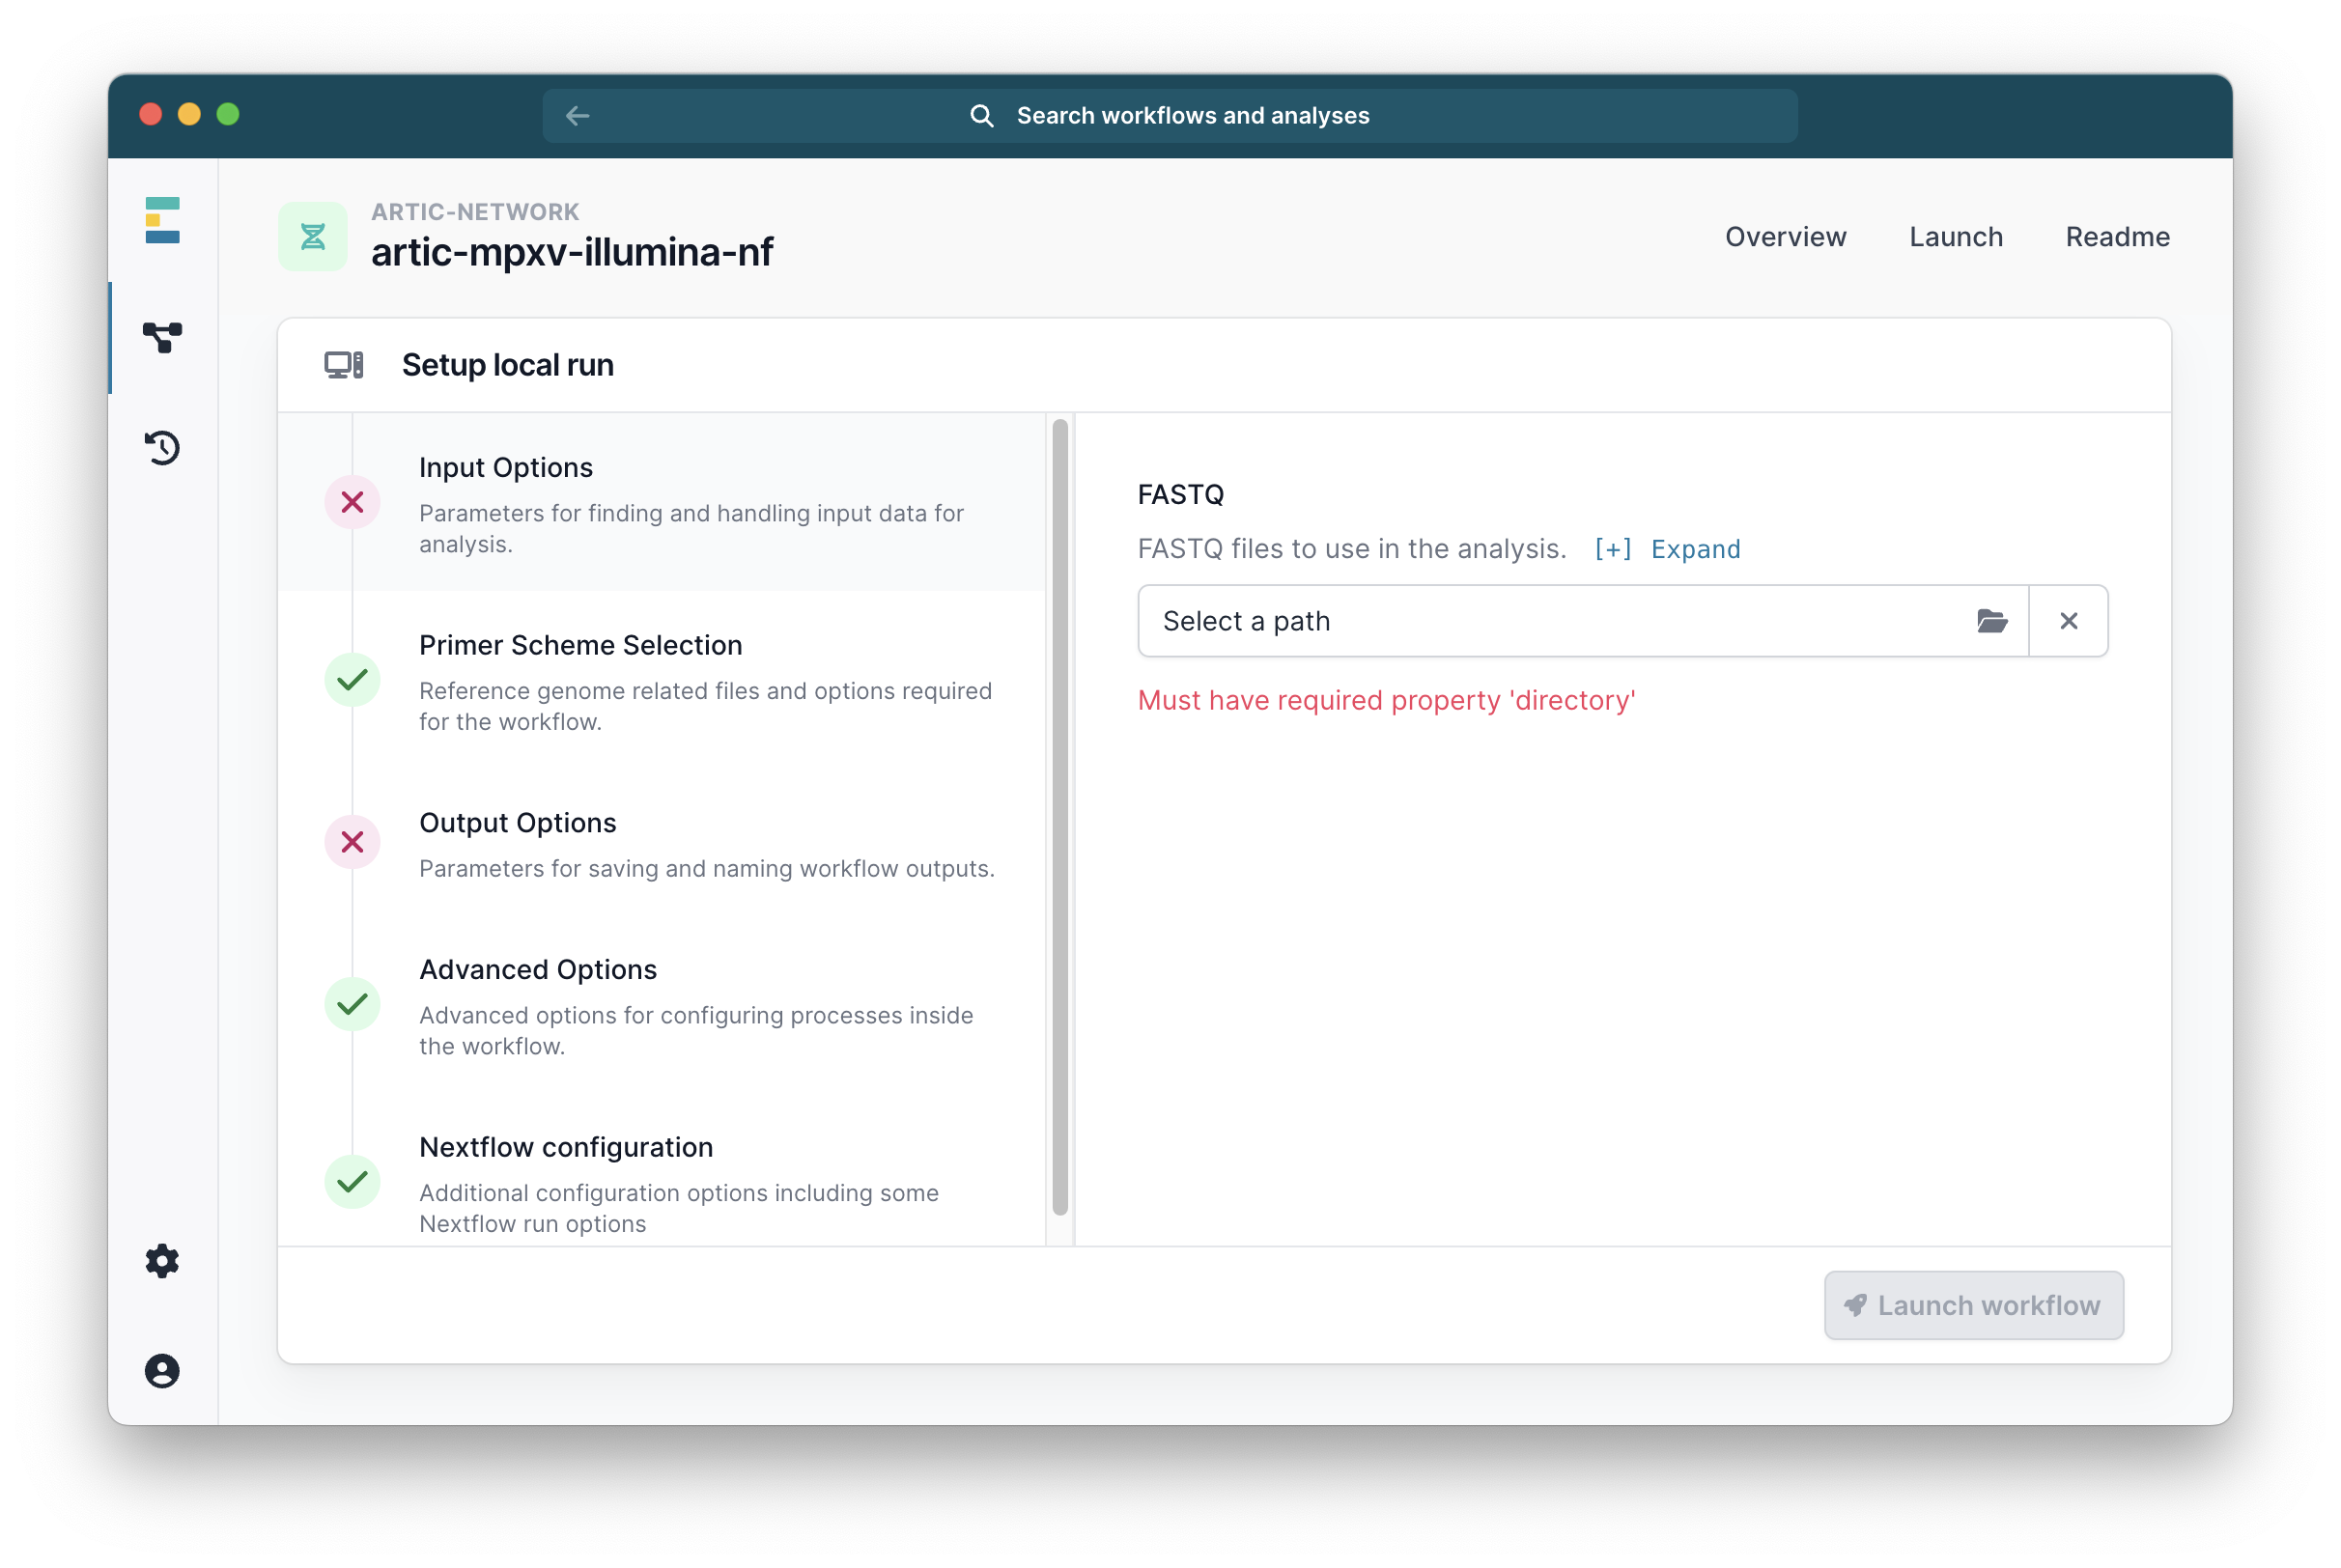
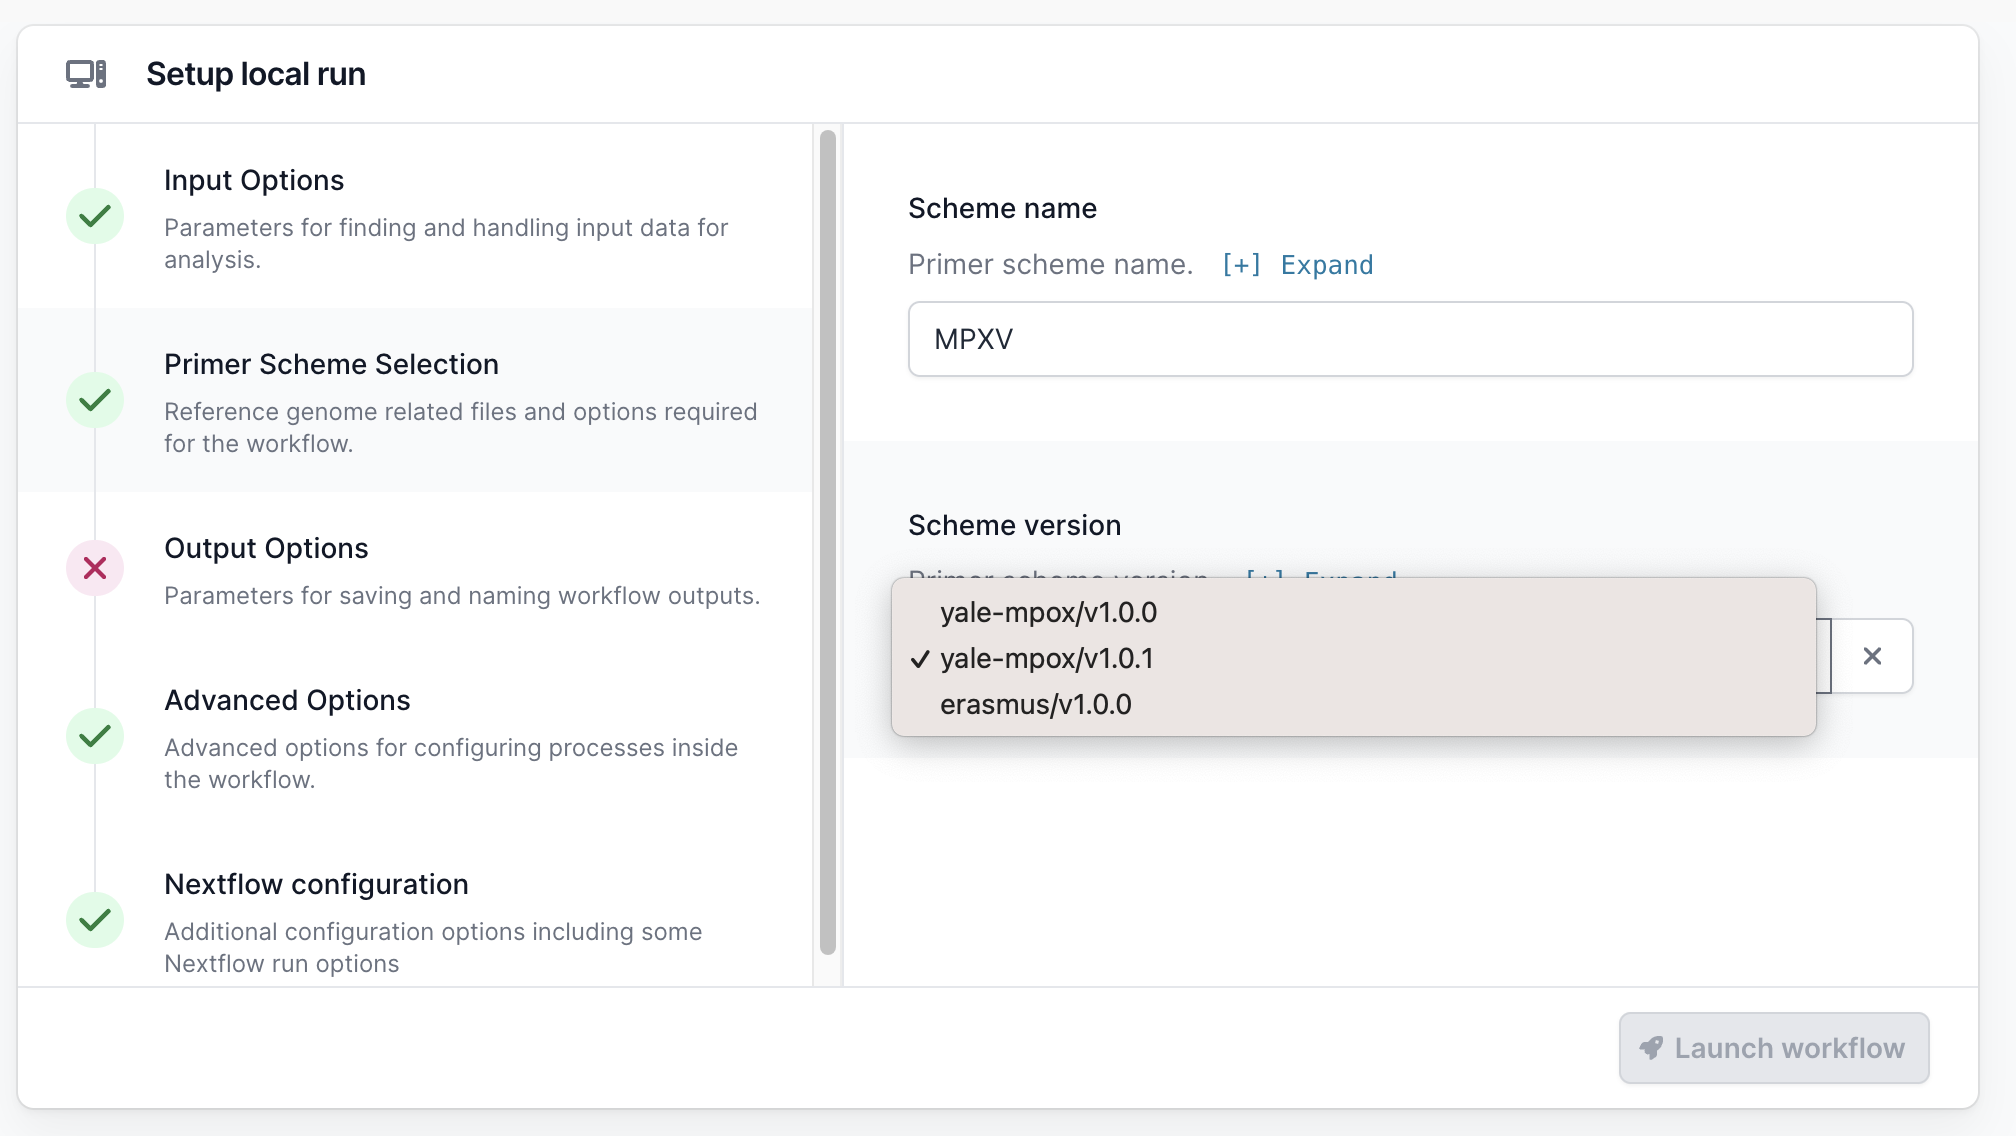
Go to the Primer Scheme Selection tab and make sure that the primer scheme matches the one you used. If your scheme is not listed, you can use the “Custom scheme” section to provide the full path to the directory containing your appropriately named scheme bed and fasta files; <SCHEME_NAME>.bed and <SCHEME_NAME>.fasta.
Go to “Squirrel Options” and select the clade which your sequences most likely belong to, if you are unsure of the specific subclade or you have a mixture within your sequencing run you may select a higher level clade (e.g. cladei). If you do not wish to run squirrel you may also select “Skip Squirrel” to skip it.
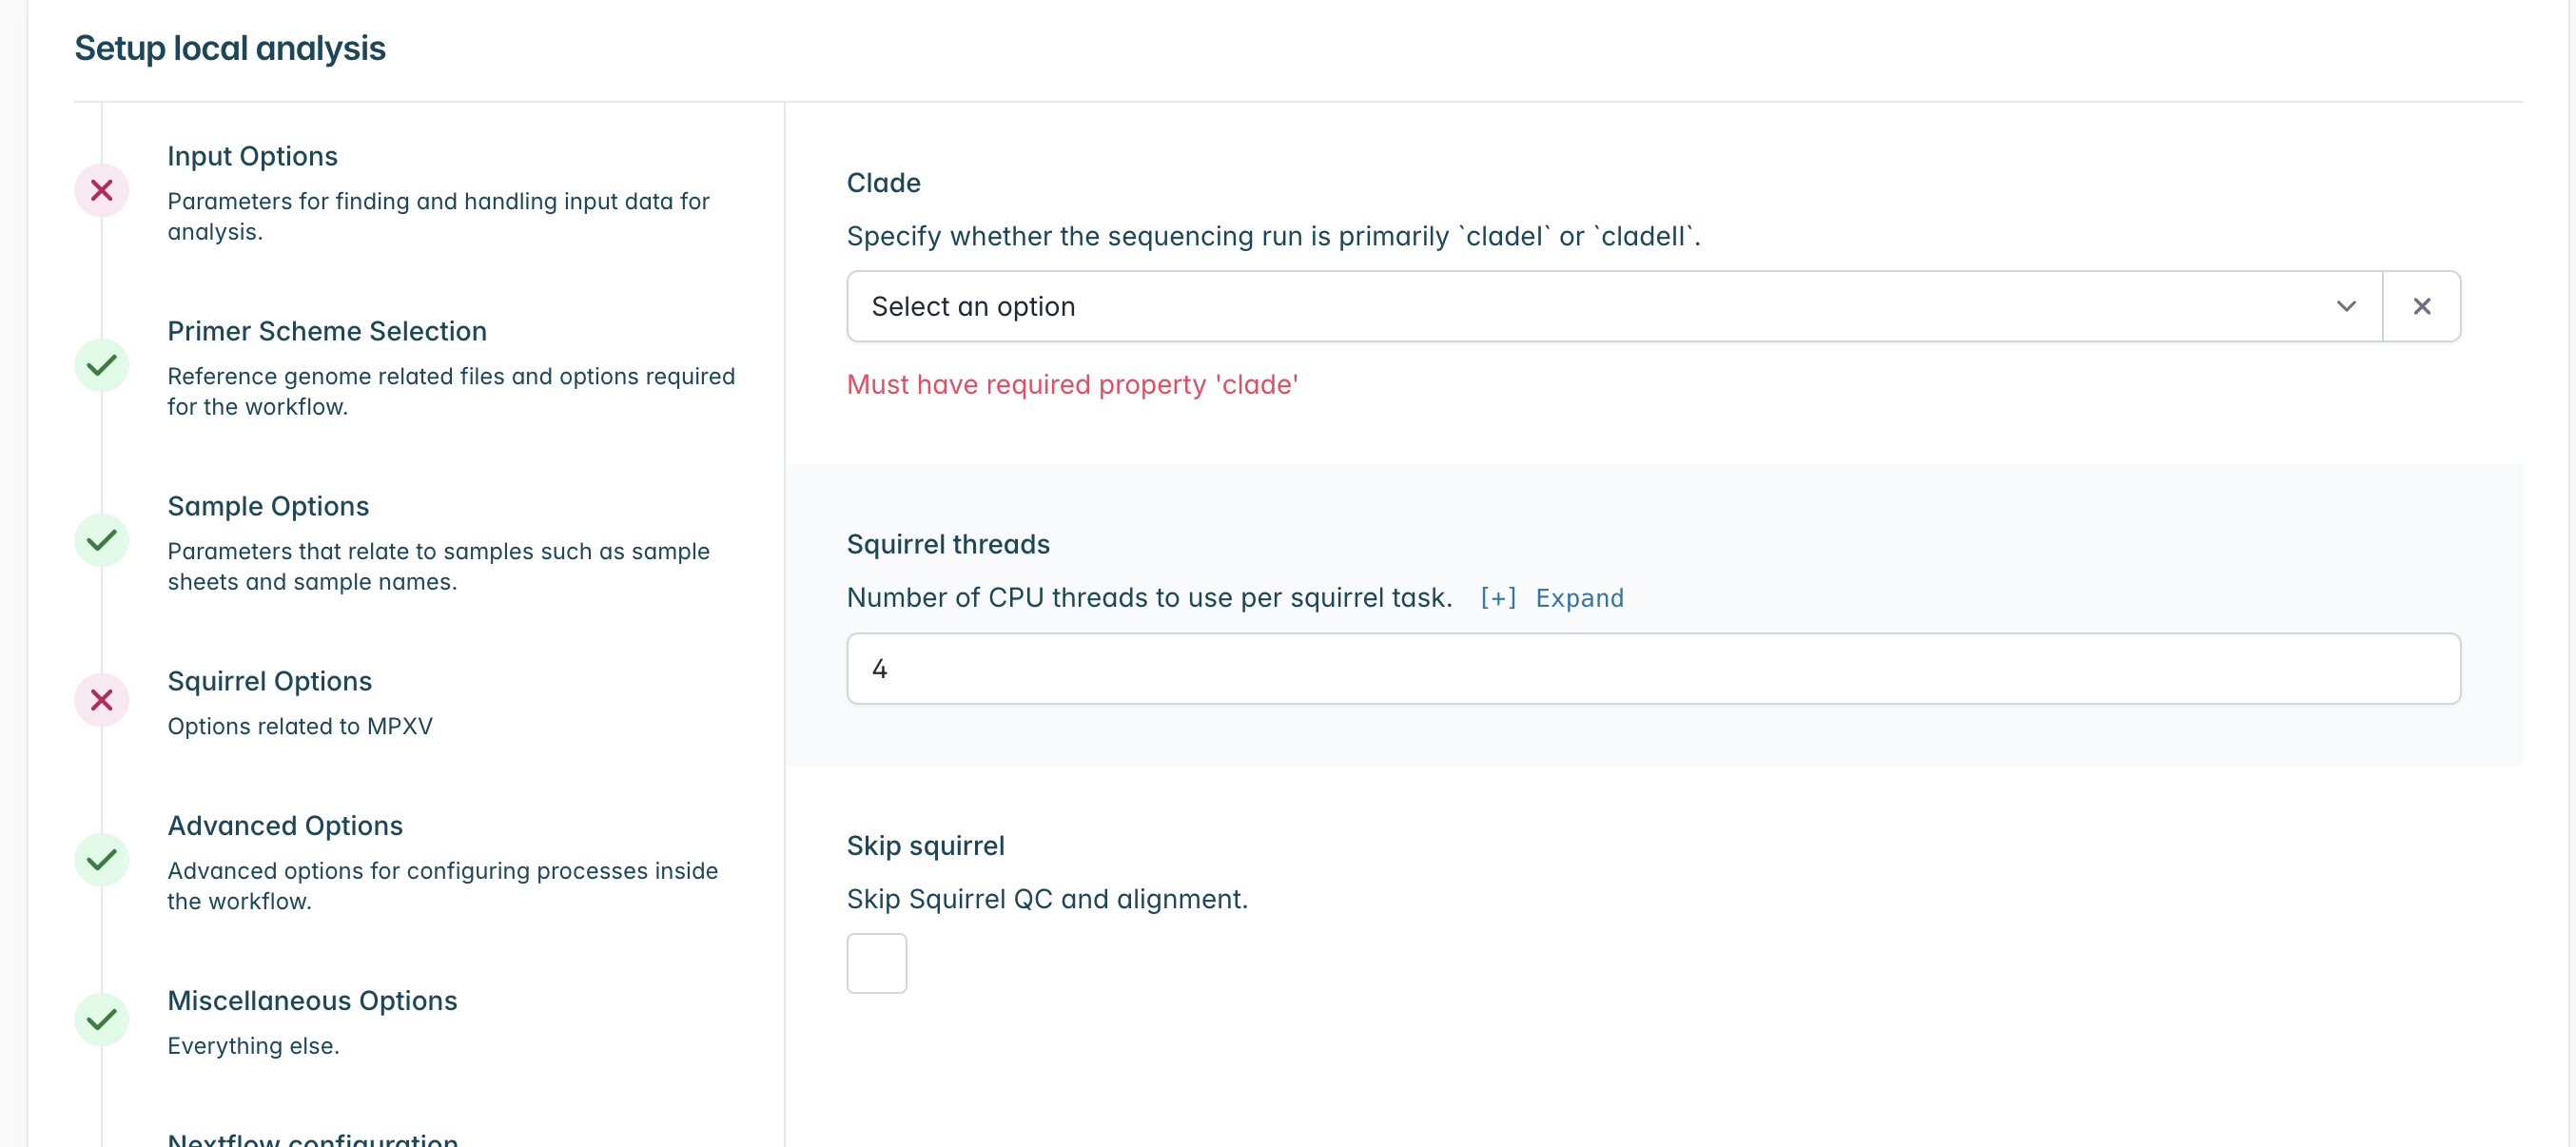
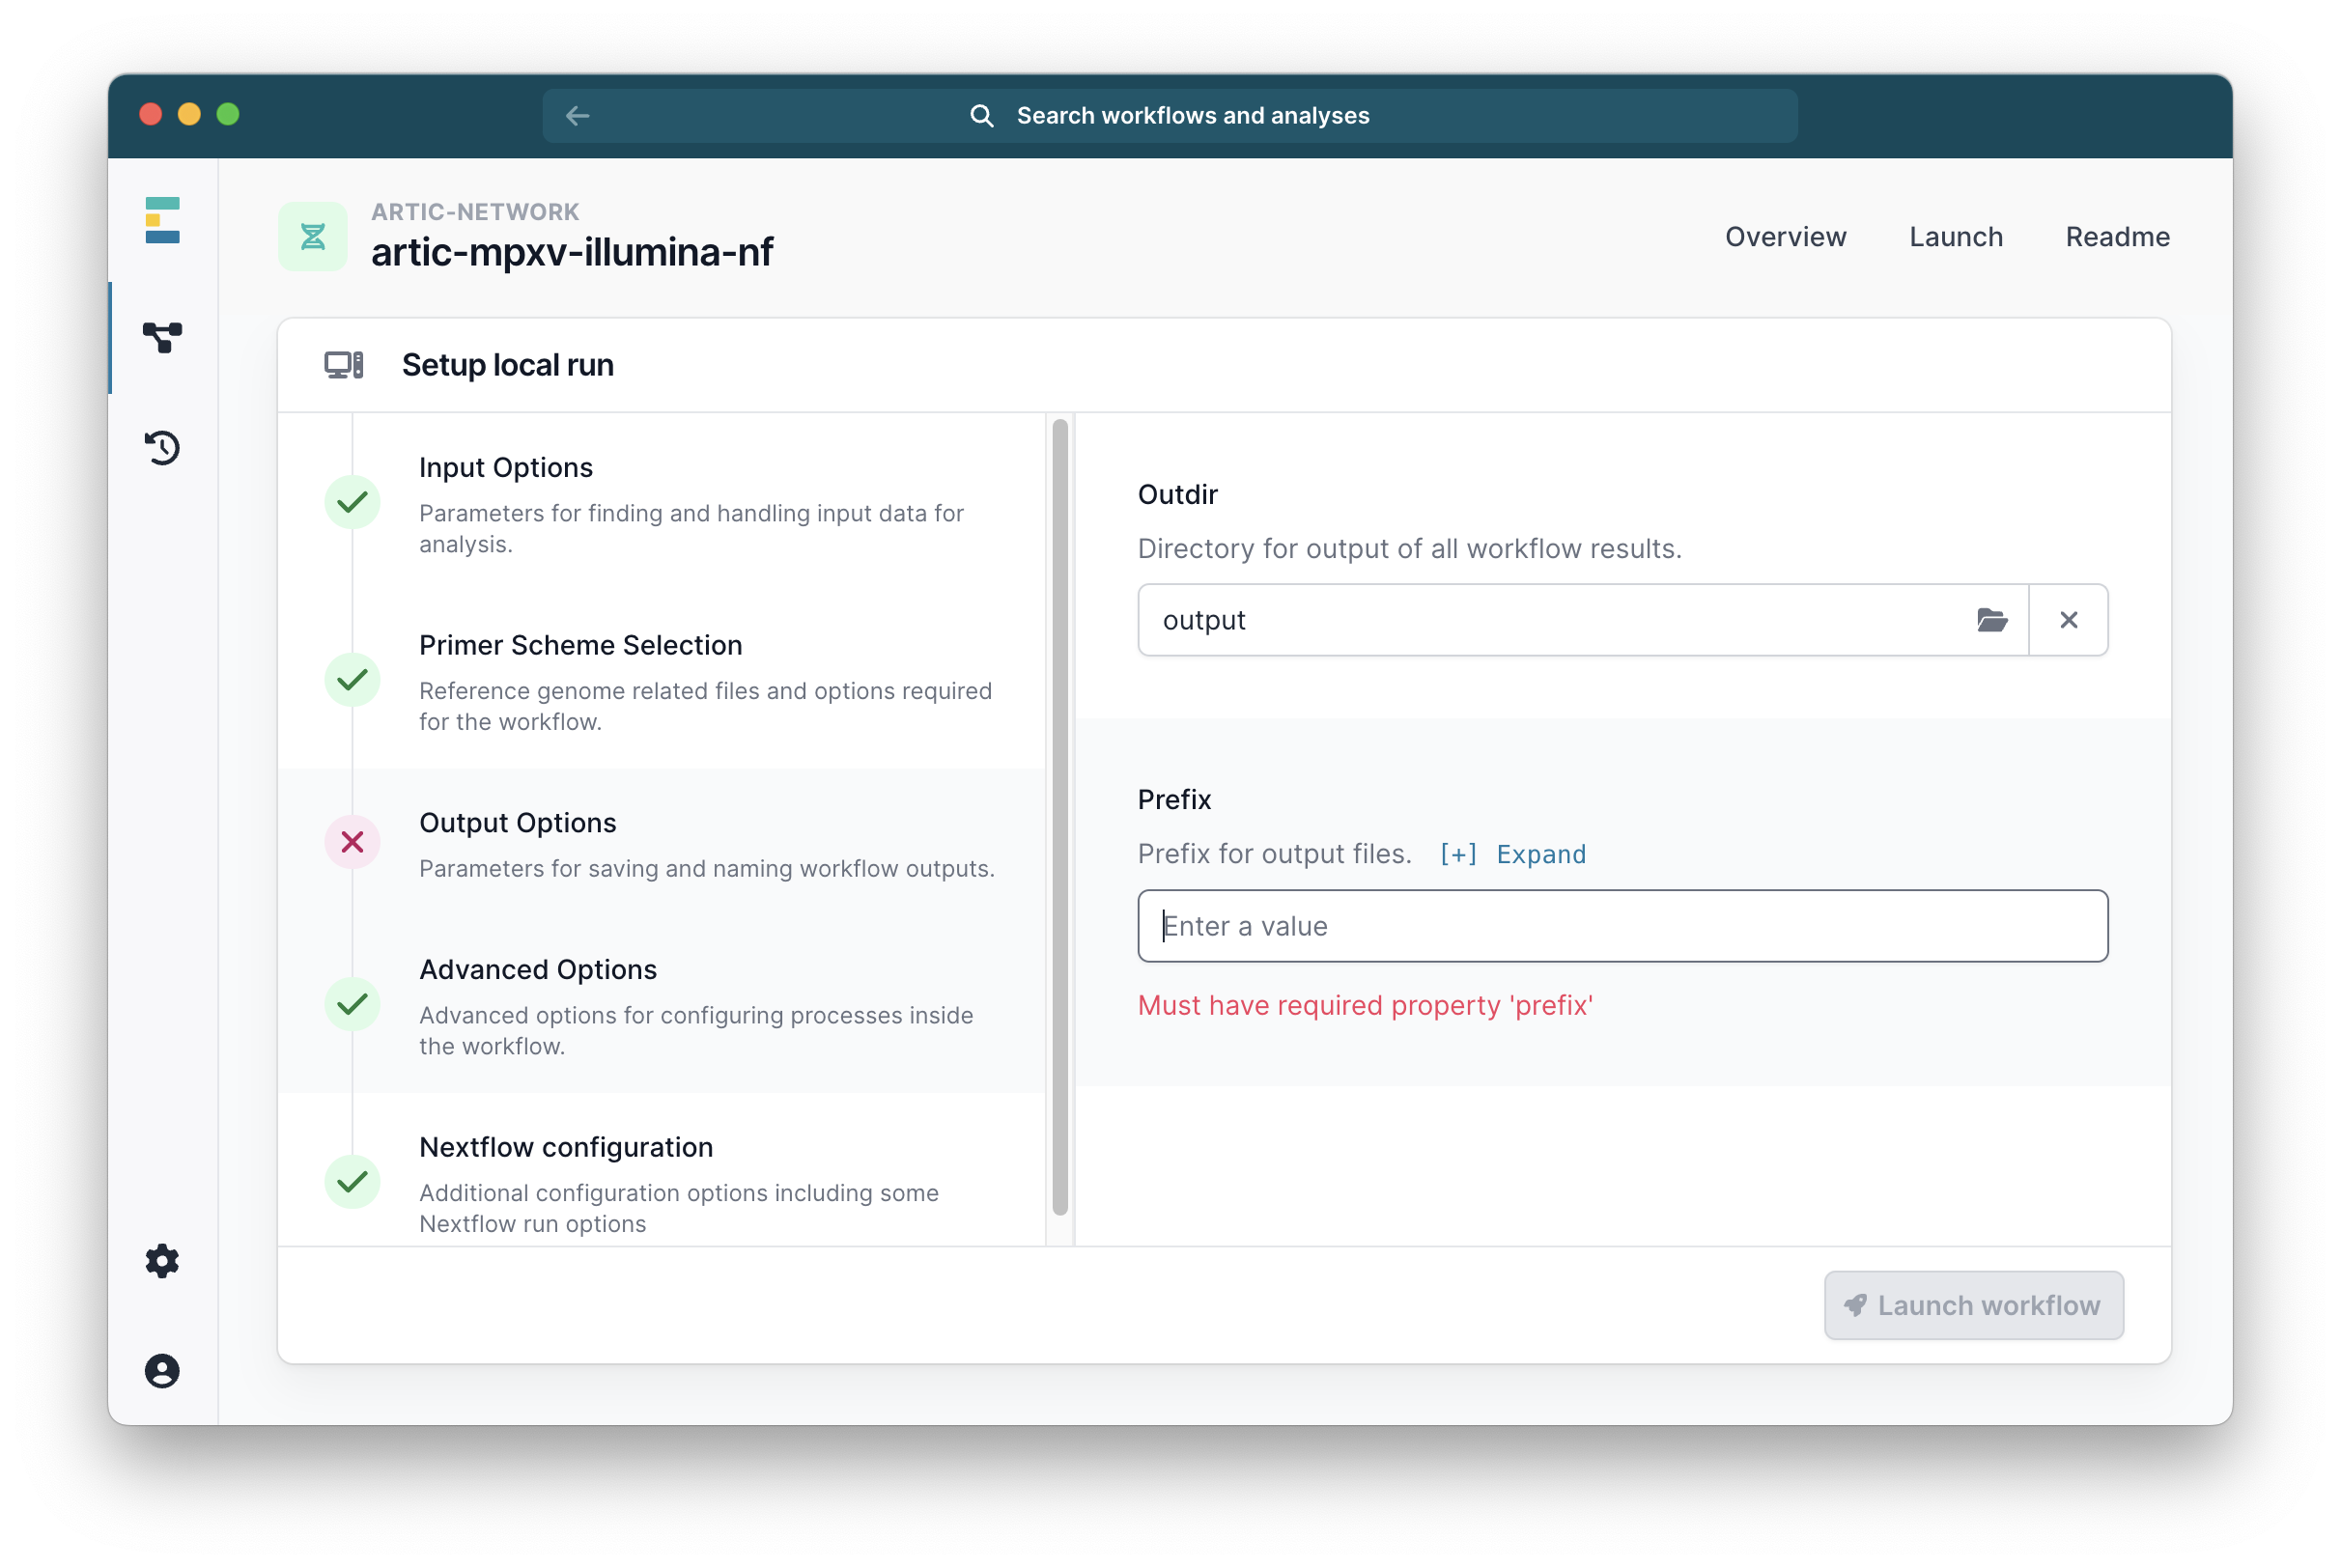
Go to the ‘Output Options’ tab and select your desired output folder, and the prefix you want for your output files.
The ‘Advanced Options’ have been set to defaults which are suitable for most cases, but can be changed if you wish.
Once you have selected everything you need, click ‘Launch workflow’.
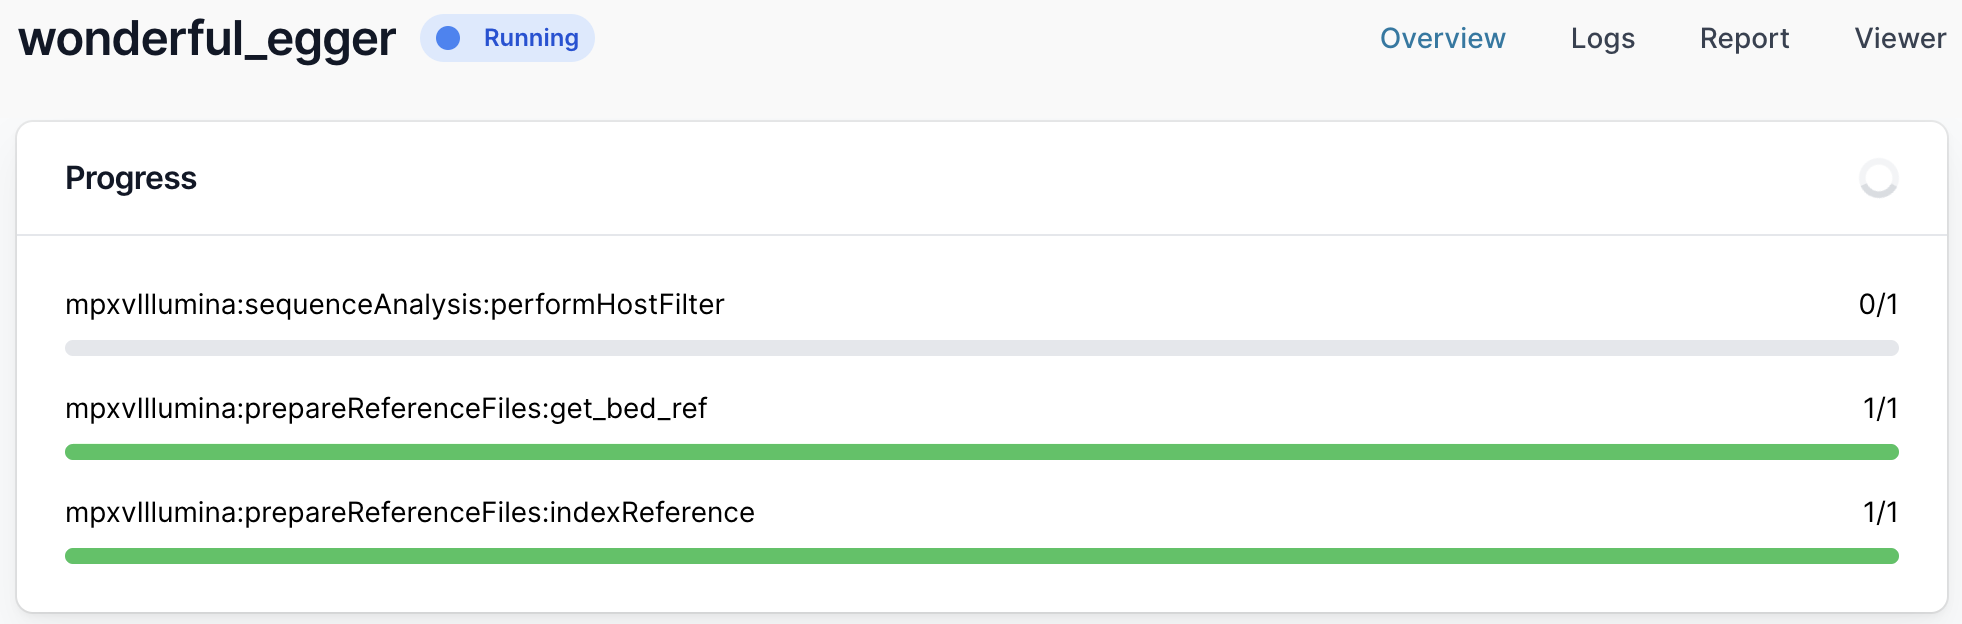
It will then start running. The runtime will depend on the size of your files and the speed of your computer, but >30 minutes is common. While it is running you will see a series of progress bars, and at the top a blue ‘Running’ icon. This will change to green and ‘Complete’ when it has finished.
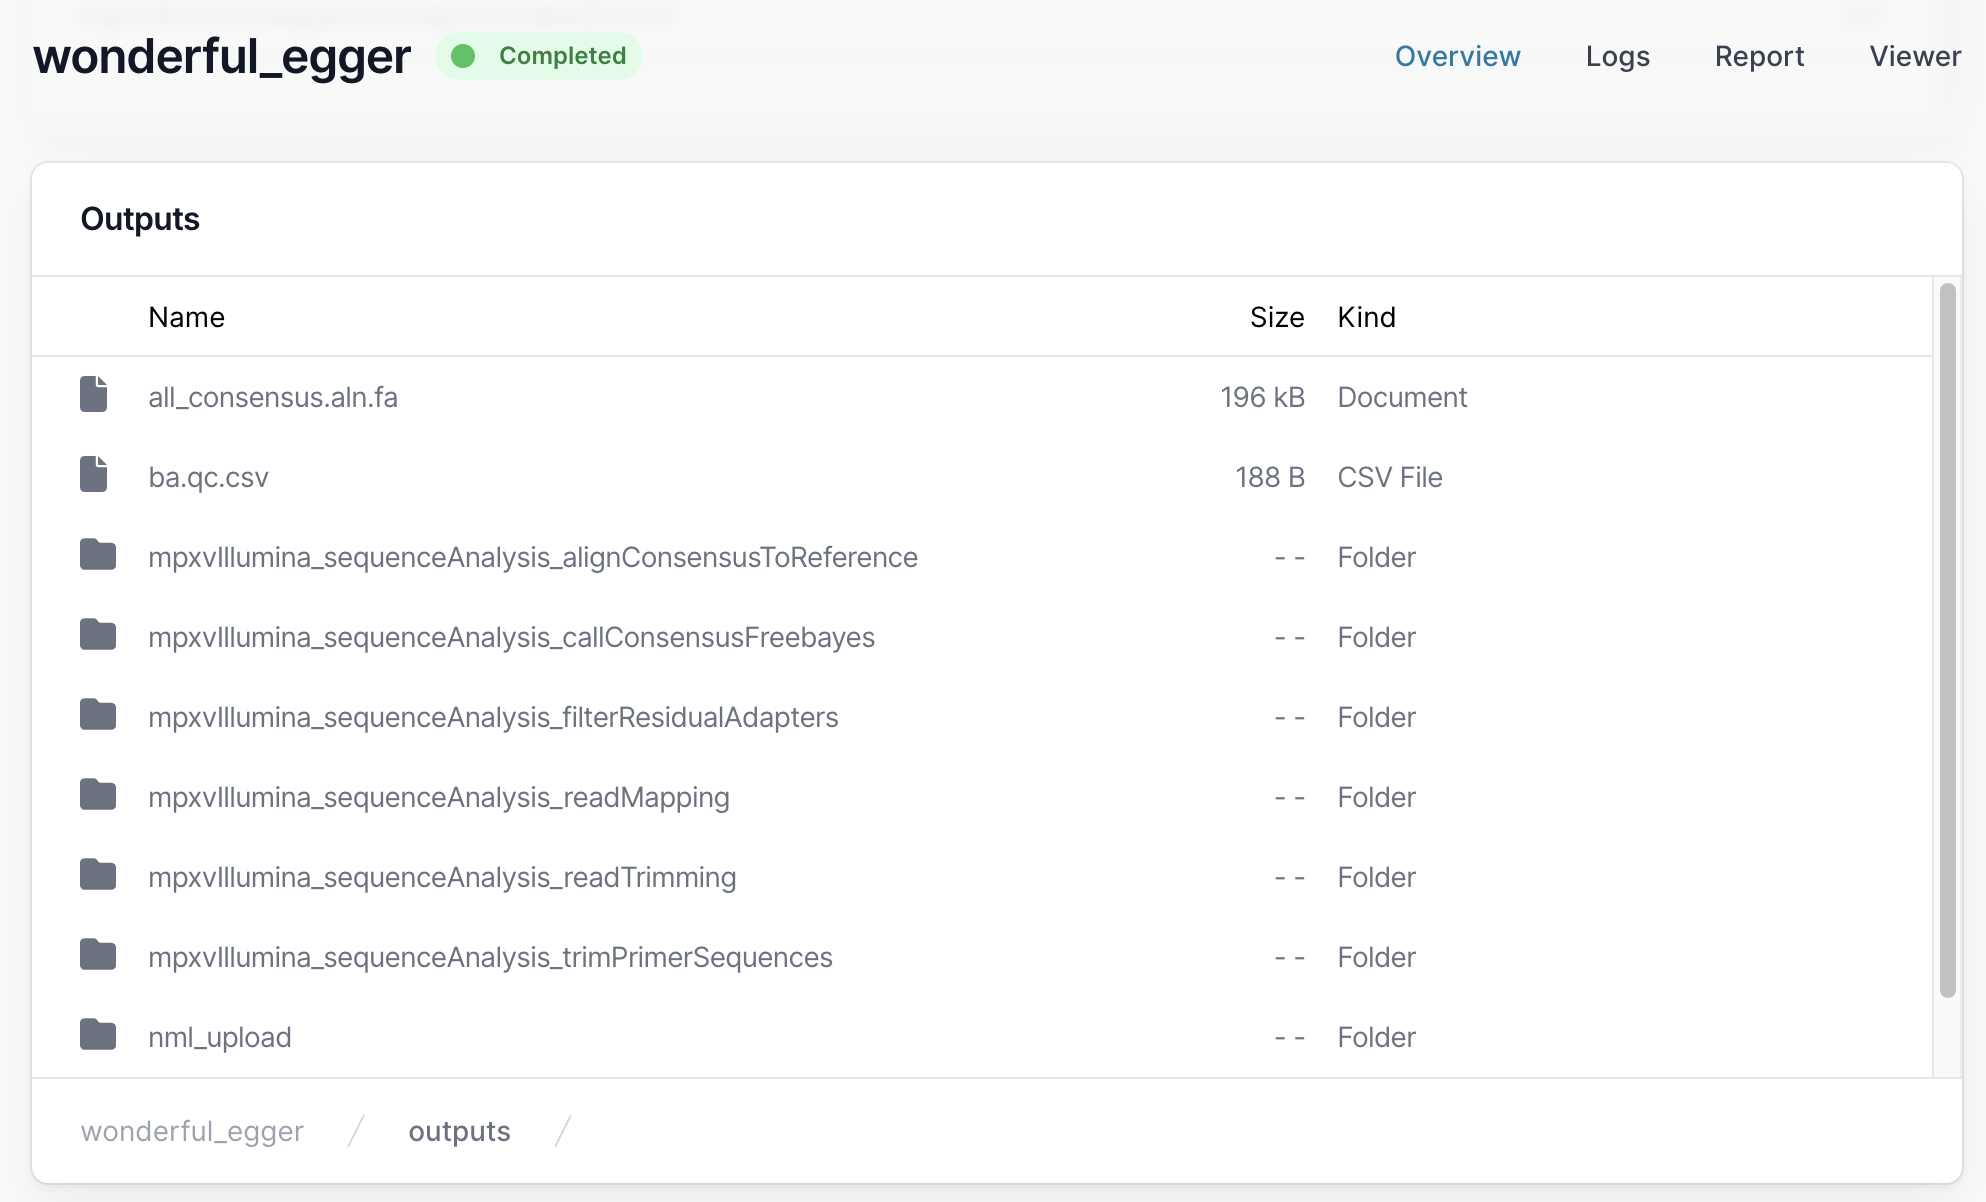
Fasta files can be found in the output alignConsensusToReference folder.
Advanced Options
Changing the pipeline version
If you need to use a previous or a development version of the pipeline, this can be selected from the workflow landing page.
Related documents:
This pipeline can also be run in a command-line environment. See this document for detailed instructions for doing this.